

Email drip campaigns are intimidating.
They’re complicated, requiring you to create a bunch of content, write a bunch of emails, and then stitch it all together somehow.
So let’s try to make it a bit easier.
This article will (as much as I can) dumb this whole thing down. I’ll give you a lead-nurturing template of content and emails and show you how to set it all up.
For the purposes of this article I’ll be using Wishpond’s marketing automation platform to show you how the strategy works. It’s not bias, it’s just the platform I happen to have access to that does all the things I need it to.
Well, maybe a little bias…
Let’s get rolling!
Introduction to Lead Nurturing Drip Campaigns
4:1:1. That’s your new mantra for early-stage lead nurturing.
Four Educational; one Transition; one Closing.
6 emails which take a new lead and nurture them into someone ready to become a customer.
Stitch them together with a bit of a delay and you deliver relevant value to your lead, becoming trusted and reliable. So when you happen to mention that your platform or service addresses one of their pain points, they believe you.
For this article I’ll be creating an example SaaS drip campaign very similar to ones run by Wishpond’s own marketing team.
I’ll structure it chronologically:
- Create your content (creating a drip campaign without content is like firing a gun with no ammo in it)
- Write your drip emails
- Create your landing page
- Create your workflow and timing
- Execute (and bonus tips)
You’ll see this a bit later, but I’ll be creating a lead-nurturing drip campaign for a lead who downloads an ebook on the subject of landing pages and is therefore being nurtured towards that element of my business’ platform.
Step 1: Create your Content
In order to nurture your leads into sales you need to have content to do so.
A lot of this can be from your blog, as you don’t want to be creating extra content for nurturing your leads (setting up a drip campaign for each of your lead-gen strategies is time-consuming enough).
But it does have to be relevant.
Because my lead will be generated with an email-gated ebook on landing pages, my drip campaign will revolve around that subject.
If you’ve created an ebook on a subject, I’m sure you have a wide breadth of blog content on that same subject. Take your best (most engaged, most shared, best-written) and use it to nurture your leads.
Choose content (four educational, one transition) which follows this pattern:
- First article: Basic – simple but highly relevant
- Second article: Transparency – builds rapport
- Third article: Resource – highly valuable for every business
- Fourth article: Personal – “Mistakes I’ve made and what I learned” with some business exposure
- Fifth article: Comprehensive – long-form, shows your business clearly
Hopefully it goes without saying (we’re all informed adults here) that these are simply my own recommendations, and need to be tested exhaustively before committing to any lead-nurturing pattern.
Step 2: Create your Emails
Email #1 (Educational):
Subject Line: “The next step for your landing pages”
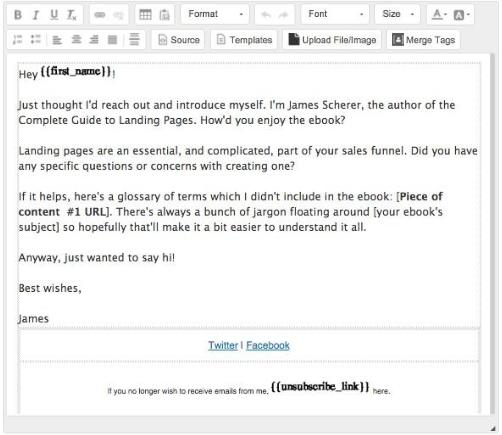
The first email in your drip campaign should introduce yourself as well as give something simple. In the example above it’s a glossary for landing page terms, delivered with personality and individuality.
Remember, these emails shouldn’t feel automated at any time. They should feel like they’re sent from one person within your company to each individual lead.
Email #2 (Educational):
Subject Line: ”We just did something with our landing page that you have to try”
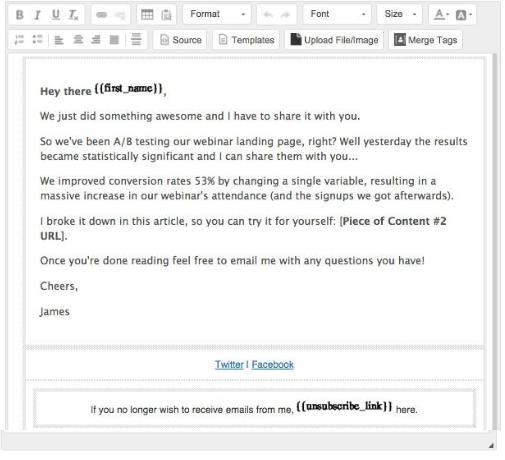
Sharing your personal experience (either through strategies you’ve implemented or mistakes you’ve made) develops your relationship and a feeling of honesty/transparency.
This second email does just that, starting a conversation of “we found success doing this thing and, because you’re my friend, I need to share it with you.”
Email #3 (Educational):
Subject Line: ”Free image resources we’ve compiled since 2013”

I like to throw in a somewhat irrelevant resource of definite value to your lead – like a list of free tools, a downloadable library of free images, etc. No matter your lead or their interests, this kind of content is inarguably useful.
Email #4 (Educational):
Subject Line: “My most influential landing page A/B tests from 2015”
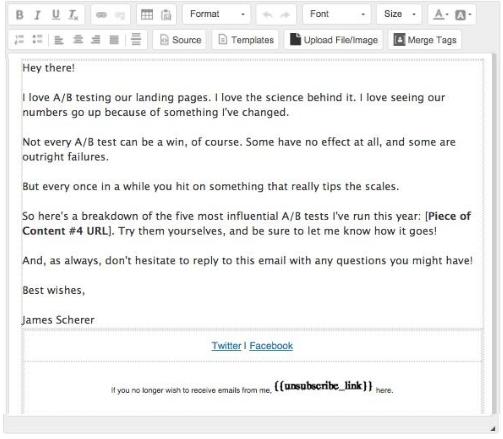
Again, this is an educational piece of content tied in with transparency.
It should also feature your service or platform in a small, almost subconscious way. For instance, while I wouldn’t necessarily mention that our tool has A/B testing, each of the screenshots in the article might feature the Wishpond logo.
Email #5 (Transition):
Subject Line: “How to set up a sales funnel with multiple landing pages (step-by-step guide)”
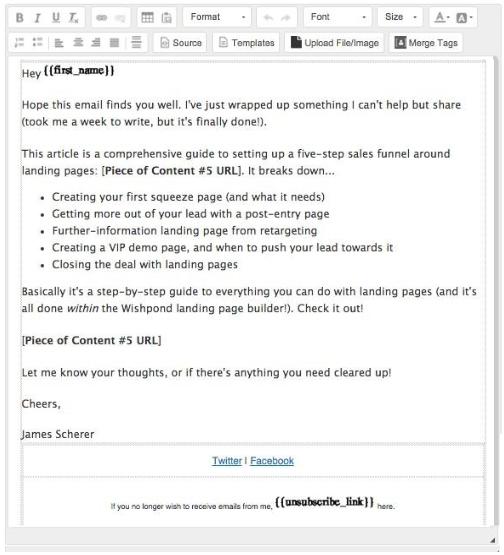
This is an in-depth, long-form piece of content which gives a comprehensive guide to a strategy related to your lead’s pain point and your platform. Like the article in Email #4, it features your platform clearly, but it also might mention a few unique selling points in the process.
Basically, the transition email is all about making it clear that your business can offer something desirable. Make sure the lead can no longer ignore the fact that you’re awesome.
Email #6 (Closing):
Subject Line: “Setting up a time to talk landing pages”
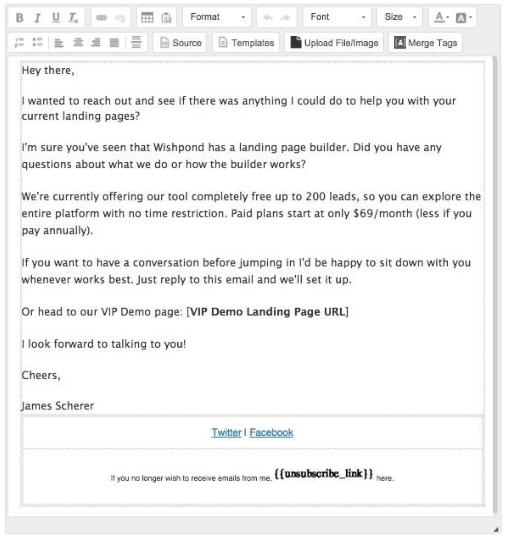
Essentials of a sales email;
- Keep it from the same sender (even if the demo is run by someone else).
- Keep it low pressure. Conversion here is a conversation or a free trial, not an annual commitment.
- Keep it super personal. This person knows and trusts you more than they know or trust your business. Get them to convert with you.
Step 3: Create your Landing Page
Only set up a landing page if you know exactly how you’re nurturing its generated leads into sales.
That’s why this is step #3 instead of #1. I don’t like to hit “publish” until I really mean it – until my lead-catching net is strung entirely and doesn’t have a single hole.
But once I’m confident I know where I’m going with my leads (the content and emails are ready to go), I can create an optimized squeeze-page, like the one below:
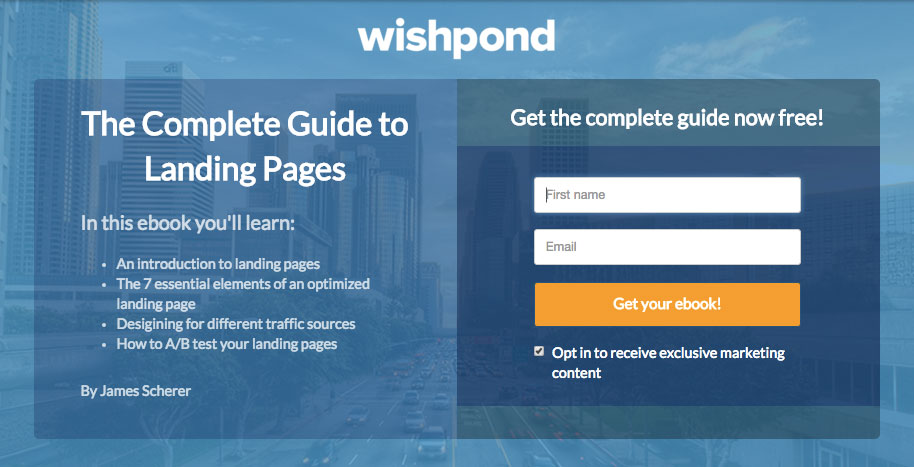
This is a simple page, but has all the components you really need.
- Clear headline letting people know they’re in the right place (after all, they’ve already clicked on a CTA banner or button for your content).
- Visually solid and professional with good alignment, clean lines and appealing font.
- Contrasting call to action and minimal form fields.
- Legally-required opt-in checkbox allowing you to email leads.
Step 4: Create your Drip Campaign
Once you have your landing page, emails, and content, it’s time to put it all together with marketing automation.
Every platform is different, of course, but they generally run on the same structure:
- Each characteristic or behavior of your visitor, lead or customer is seen by the platform.
- These can be set as “conditions” which trigger an “action” within the platform.
- Each time a new individual within your website or system meets your condition (or set of conditions) the action (or set of actions) is triggered, like with the workflow below.
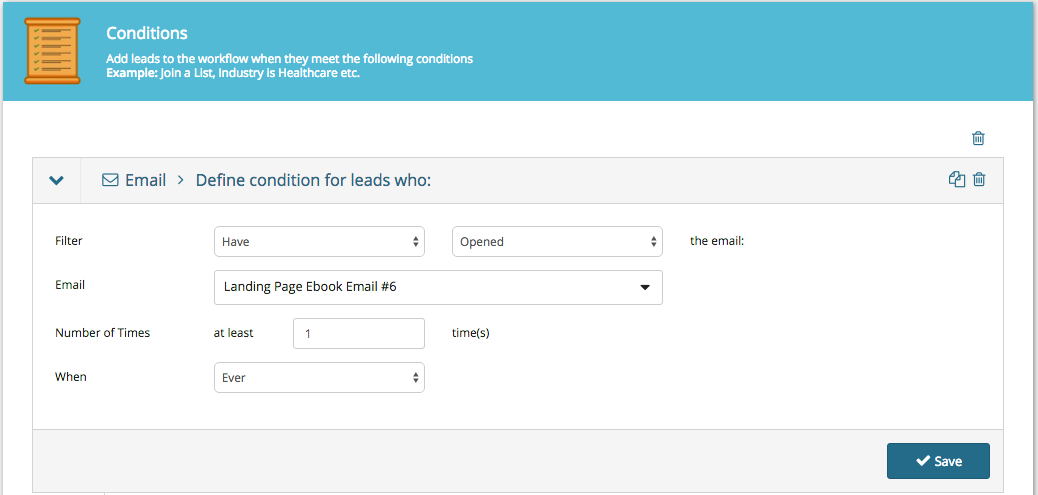
Firstly, set your conditions…
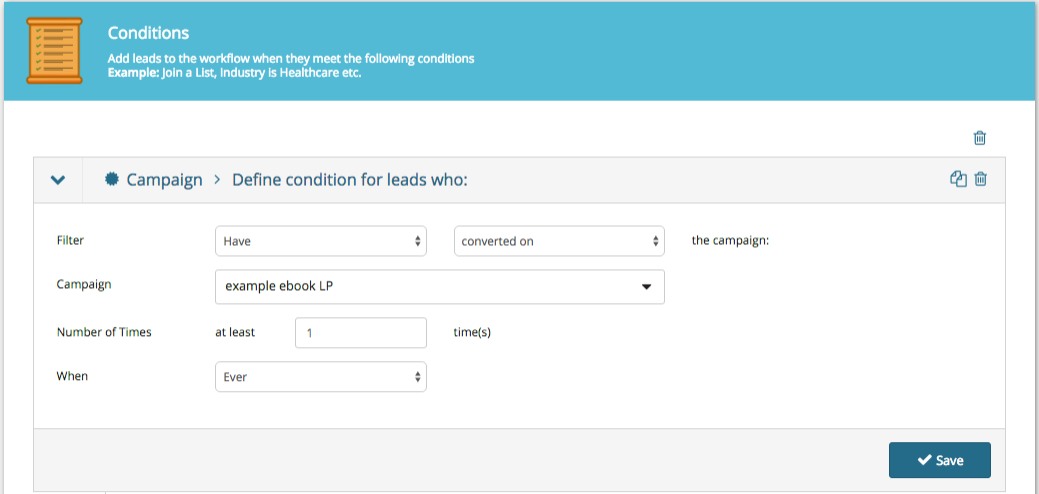
This is pretty straightforward: all leads who have converted on our landing page meet the condition for our workflow.
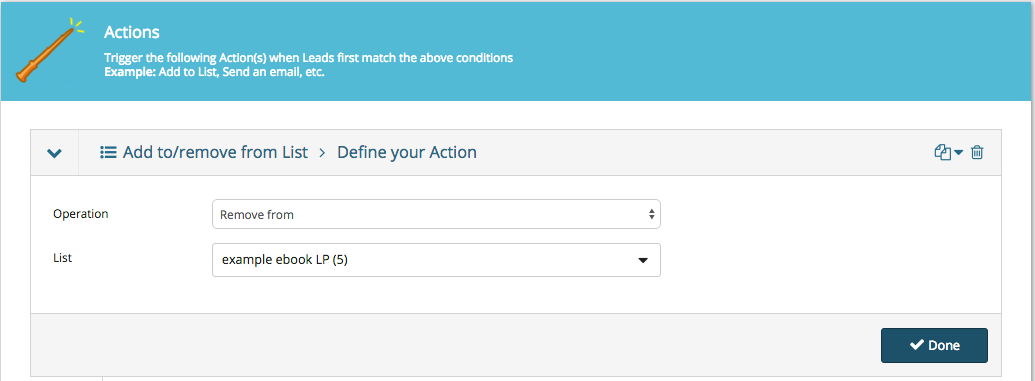
Next, let’s set the actions for this workflow. Essentially, this is the answer to the question “what’s going to happen after a lead meets the above conditions?”
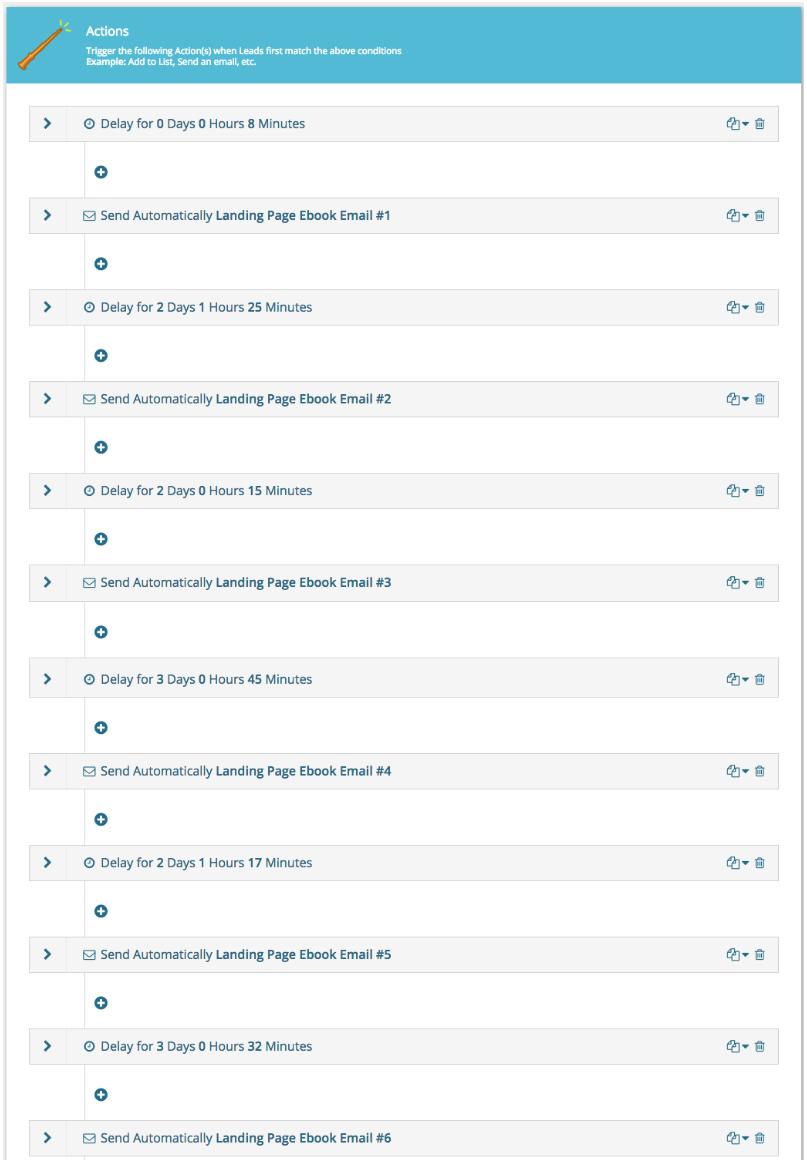
I’ve set a 7 minute delay after the initial condition is met (conversion) and then two or three days between all the subsequent drip emails being sent. I send them around the same time every day to better personalize the campaign.
Next we have to set a separate condition to stop our workflow and move our leads to the next stage of our sales funnel perhaps the “remember your VIP demo is coming up!” scheduled email).
If they opened but didn’t click through (or didn’t open), set an action which places them either into a general lead nurturing drip email flow or simply your newsletter mailout.
If your workflow’s conversion goal isn’t a paid plan (but rather a late-stage drip campaign, perhaps) simply set the conditions accordingly.
And in case you were wondering, by default all of Wishpond’s workflows are set up for each lead to only be able to meet the conditions once.
Step 5: Execute
Hit “Launch Workflow” in the top right and you’re good to go.
2 Bonus Lead-Nurturing Tips that Work for Us:
On one of your emails (one!) you can test an intentional error (for instance “forget” to attach a link to your article’s title or “accidentally” call your resource article “110 photo resources” when there’s actually 111).
Schedule an immediate (2-3 minute) follow-up email which corrects your mistake and apologizes for it.
Making an error in email is one of the most relatable things you can do in life. We’ve all done it. It’s human. And that’s the key. No automated email campaign would have a mistake in it, right?
Retargeting:
Depending on how much traffic your landing page is seeing, it might be worth setting up a simple retargeting campaign to recapture prospective leads who bounced.
You can also create a retargeting flow which coincides with your lead-nurturing campaign to encourage leads to engage with your content and emails.
Top tip for retargeting: Set your retargeting pixel to only attach to your prospective lead’s browser after they’ve been on your landing page for at least 30 seconds. This saves you money as you don’t waste it on people who aren’t actually all that interested.
Wrapping it Up
The drip campaign I’ve shown you in this article is simply a foundation from which to build and test.
Your leads may prefer a 6:2:1 set of emails or a 3 and 1. They may engage better with a sales call at the end of the funnel or a free trial or an immediate purchase. I don’t know and (even if you ask me) would tell you to test it anyway.
We at Wishpond are running a dozen or so A/B tests at any given time, all with the ultimate goal of turning leads into sales and sales into loyal customers. Drip campaigns have definitely saved us time and energy (taking out a huge amount of the effort of nurturing leads manually), but optimizing them is a constant battle.
Have you experimented with marketing automation before? What was your experience. Or do you have a bit of trepidation about diving in?
Share your experiences and questions with me in the comment section below!