
The average ecommerce website converts visitors at about 3% – meaning 97% of the visitors you pay to drive to your website end up buying.
Even if you get someone to add something to their shopping cart, around 70% of them will abandon it.
You need to turn more of your website visitors into customers.
And there’s a single, 3-part campaign which you can implement today to start fighting back. Let me break it down:
- Use popups and discount codes to incentivize website visitors to provide contact information
- Create Lists (segments) of contacts who bounce
- Automate outreach (via email) to your prospective customers with relevant value
If you’re not yet doing this, you can complete it all in a couple hours. I promise.
You’ll need the right tool for this.
You could try to do it with several different tools (though connecting everything may be difficult). Wishpond’s marketing platform does it all in a single place Book a free, 15-minute demo to talk with an ecommerce marketing expert about how it all works.
Step 1: Create a popup which incentivizes visitors to provide contact information
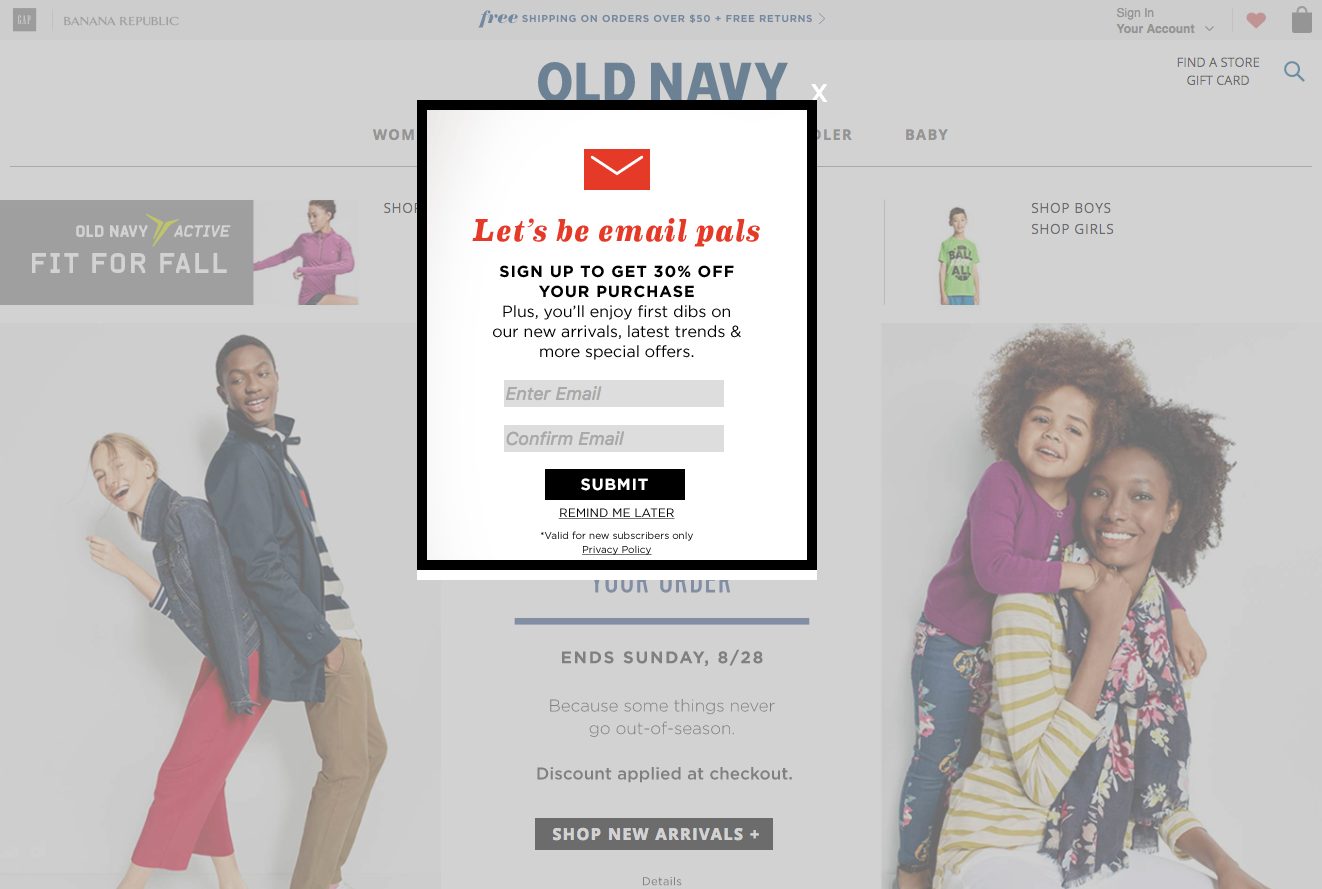
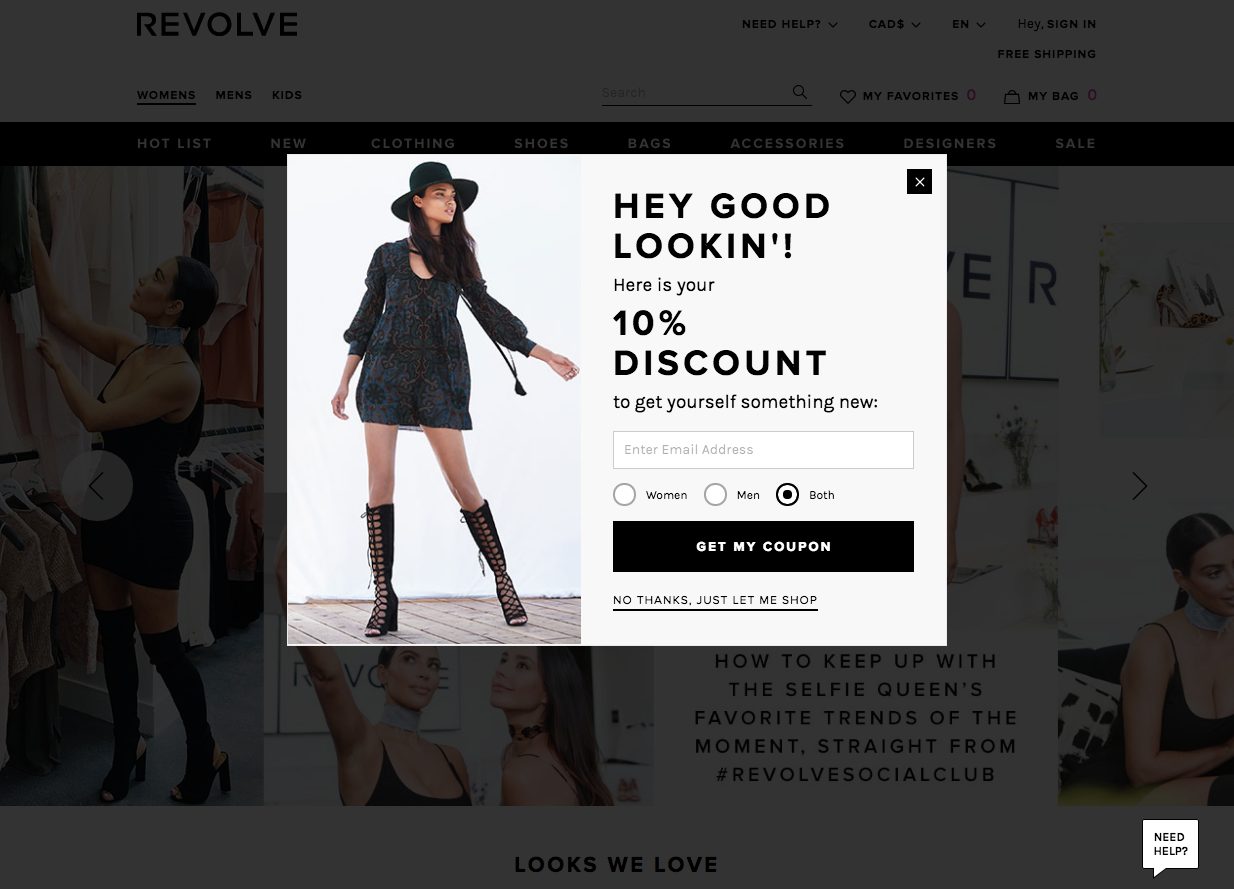
You’ve seen these. You may even have one. But I doubt you’re using them as effectively as you could be.
Here’s an example from Old Navy:
And another one from Skullcandy:
As you can tell, these are all built based on a simple template. Wishpond has a bunch of campaign templates, built specifically for the ecommerce industry.
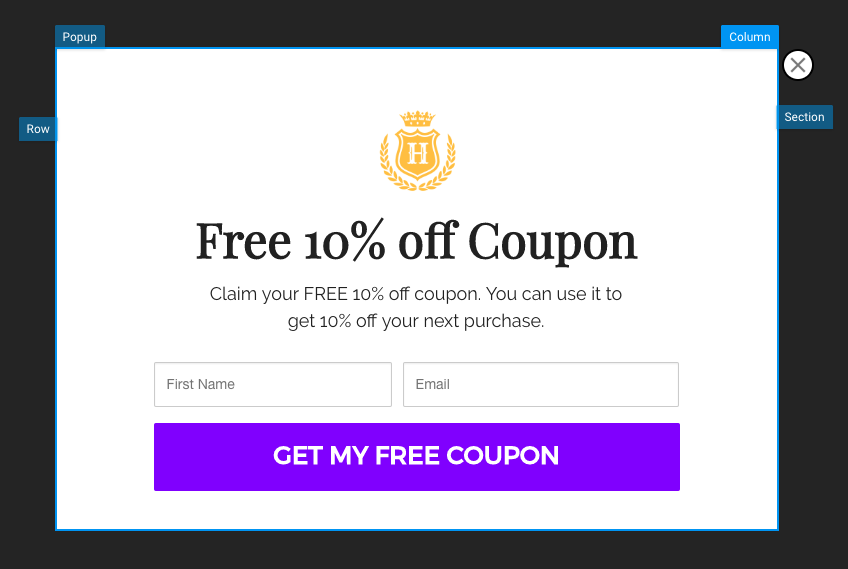
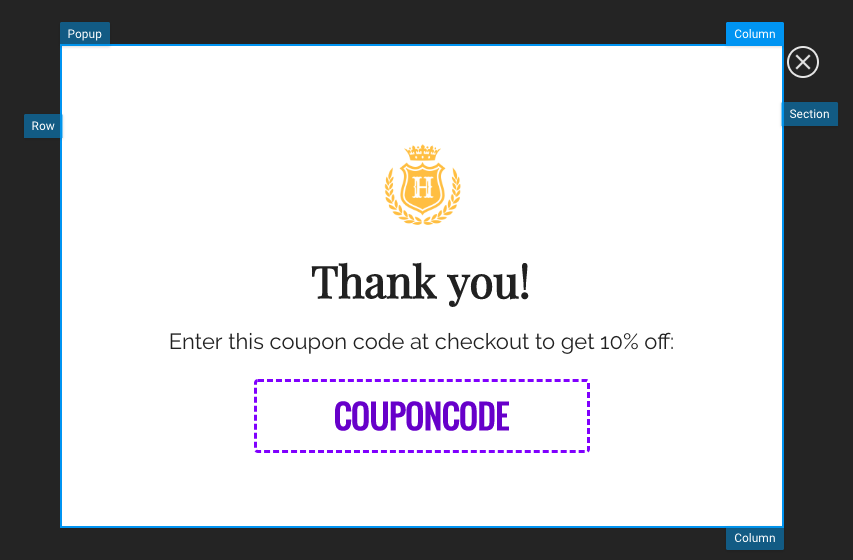
Adapt the “Discount Coupon Popup” Template
Just change the business logo at the top, the color of the button (to match your brand colors) and any copy. Should take you five minutes or so:
Create your Discount Code:
If you’re not 100% sure how to create a discount code, here are walkthroughs for the most common ecommerce platforms:
Add the Discount Code to the Popup’s Thank You Page:
You can put the discount code in the thank you page of your popup, or send it with an auto-responder email (which I’ll show you below).
Displaying your coupon code on the thank you page looks like this:
Choose How Your Popup is Triggered
There are many different ways to trigger your popup on your homepage.
Most ecommerce businesses do it in the first few seconds after a person has landed. This is either an entry popup (loads immediately) or a timed popup (loads after a certain number of seconds).
You can also use a scroll popup, to have your popup triggered when someone scrolls a certain way down the page.
Or an exit-intent popup, to have your popup triggered when someone moves their cursor to leave your website.
My recommendation would be a short-timed popup.
Choosing that looks like this:
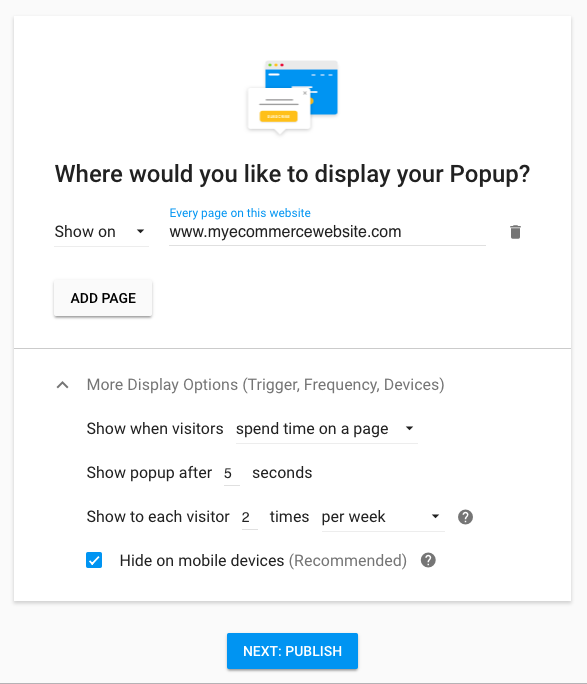
Now, just hit “Publish,” check the popup is showing on your website, and you’re good to go.
Step 2: Segment your new contacts
Everybody who converts on your popup will automatically be added to the campaign list. This is automatic. But sending everybody who converts on that popup an email prompting them to buy would be a waste.
You don’t want to send people an email prompting them to buy if they already have.
In fact, we want to create a few different Lists from the people who provide their contact information on your new popup:
- New contacts who bought
- New contacts who added something to their cart but didn’t buy
- New contacts who didn’t add something to their cart
To make the most money from these people (no use in beating around the bush, here), you should be personalizing the communication they receive from your business. And that means segmentation.
To do that, we’ll use Wishpond’s marketing automation tool.
Create a List of new leads who bought
First, head to the “Leads” tab at the top of your Wishpond dashboard. Then click the orange “Create List” button on the top right.
Name your list (something like “New Leads Who Bought”) and tick “Smart List.”
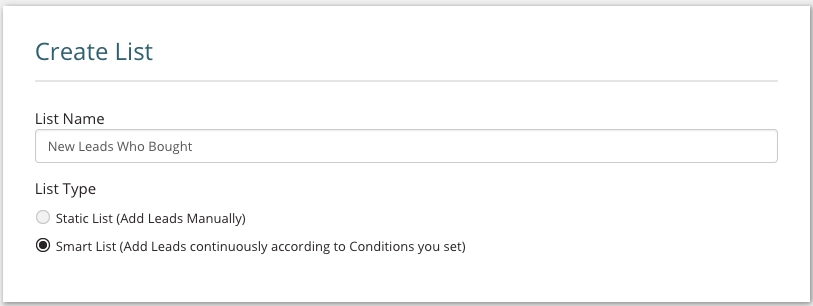
This allows you to set the conditions which need to be met before someone is added to your new list.
- Click “List” then select the List which was automatically created when you published your popup
- Click “Lead Property” then select your “Checked Out” lead property (or the equivalent). If you haven’t done that yet, here’s a walkthrough.
You’ll end up with something like this:
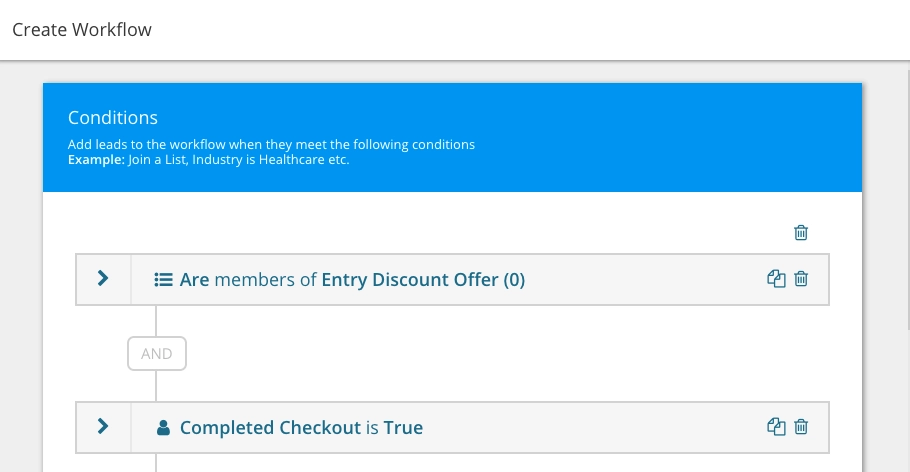
An alternative to doing the lead property thing (it is a bit advanced) would be to do it based on pageview. For instance, “Are members of the List ‘Entry Discount Offer'” AND “[Have not] viewed the web page [URLs containing] + [your checkout or thank you page].”
That would look like this:
As your popup is converted upon, and people start completing their purchase, your new List will populate.
Create Lists of new leads who added to cart but didn’t buy and didn’t do anything
Then, do the exact same thing for people who didn’t buy, but set the conditions just slightly differently.
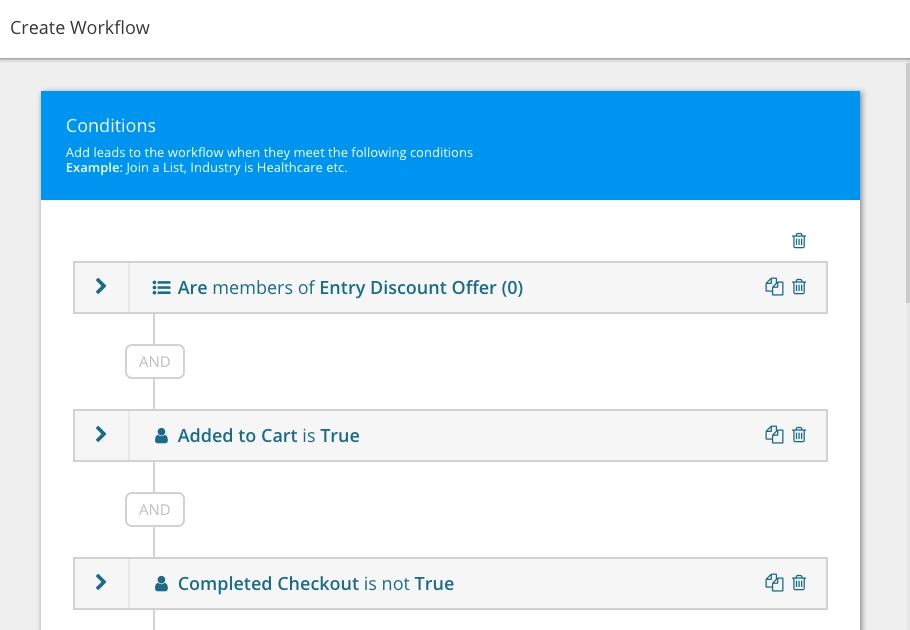
For people who added a product to their cart, set the conditions like this:
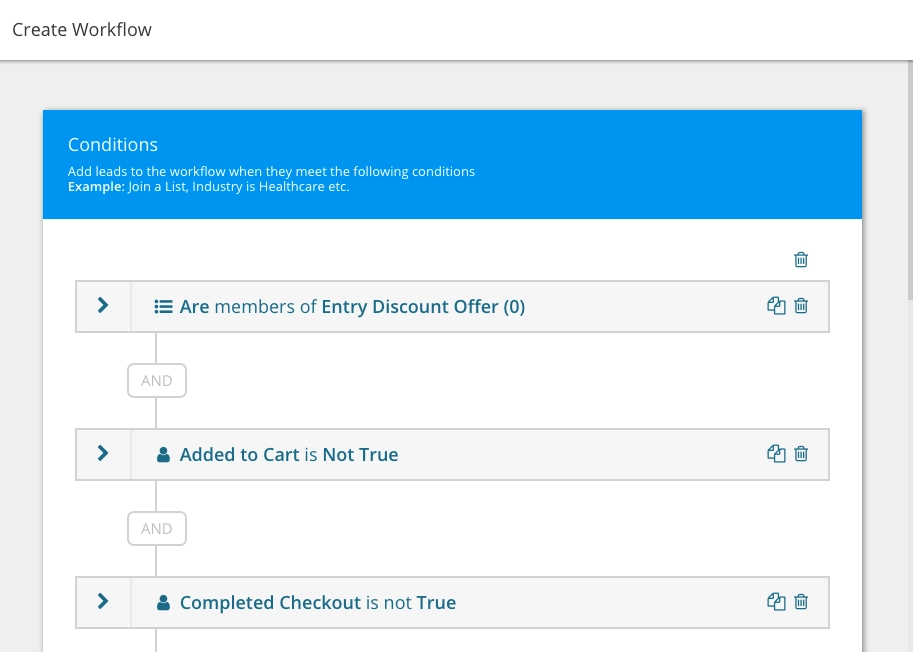
For people who left your website before doing any buying action, set the conditions like this:
You now have three Lists to whom you can send personalized emails.
However, doing that manually would be a waste of your very valuable time. Before we can clock off, let’s automate a couple emails to these people.
Besides, we want to ensure those “added to cart but didn’t buy” and “didn’t do anything” people complete a purchase.
Step 3: Automate an email campaign to your new contacts
First, head to the Email Automation tab, select “Email Automation” from the two formats, and choose “Standard Workflow.”
Marketing automation can be a bit intimidating, so focus up.
As a reminder, automation works based on the phrase, “if this thing occurs, do this thing.” When conditions are met, an action is triggered.
The action we want is to send our Lists an email (or series of emails).
The conditions of our email campaigns are simple: “Are members of [one of the three lists above].”
You probably already have a purchase confirmation email built into your ecommerce platform, so we don’t need to automate that one for the first list.
But for the people who didn’t buy, there’s a couple things we can do…
Sending an email to people who abandoned their cart
The primary reason that people abandon their ecommerce shopping cart is unexpected costs, so let’s address that, shall we?
Now, the most successful ecommerce brands implement an advanced strategy here, where they automatically send an email to their prospective customers showing the product they left in their shopping cart.
Here’s an example of that from Clearly eyewear:
![]()
But not every early-stage ecommerce business has the resources to make that happen for all their products.
That doesn’t mean you shouldn’t send an abandoned cart email anyway.
My recommendation would be something simple, like this:
Hey there!
Noticed you left something in your [your brand] shopping cart, and wanted to reach out.
As a first-time customer, we’d like to offer you free shipping within North America!
To remove the cost of shipping from your purchase, click here.
And if you have any questions, just reply to this email and I’d be happy to answer them!
Cheers,
[Your Name]
To give your new leads free shipping…
Sending an email to people who didn’t do anything
The email sent to first-time visitors who opted in but didn’t put anything in their cart might look something like this:
Hey there!
Wanted to welcome you to the [your brand name] email list!
We’re super happy to have you with us, and wanted to offer you a little something to say thank you.
For the next 7 days, you can get 25% off your first purchase if you use discount code FIRST328.
Again, that discount code will expire in 7 days, so take advantage while you have it!
Cheers!
[Your Name]
My recommendation for both of these emails would be to send a follow-up (at least one) simply reminding people of the value they can get, either with free shipping or the discount code.
For the limited-time discount code, send three emails: One as soon as they subscribe, one 48 hours before the discount expires and one 24 hours before.
Final Thoughts
Hopefully this article has given you a satisfactory walkthrough for creating what I truly believe is the one “can’t miss” marketing strategy for ecommerce companies.
If you have any questions about setting any of this up, I recommend you jump on a call with one of Wishpond’s marketing experts. It’s free, and even if you don’t choose us as your marketing platform a conversation with an expert is never a waste of time!
Related Reading:
- How to Write The Best Abandoned Cart Emails
- Ecommerce Optimization: Smart Website Additions Guaranteed to Boost Sales
- Ecommerce Email Marketing: 7 Examples & Strategies to Drive Sales
- A Step-by-Step Walkthrough of a Complete B2C Marketing Campaign (Clearly Eyewear)
- 30 Reliable Ecommerce Marketing Strategies (With Real-World Examples)
- How to Drive Traffic to Your Online Store: 3 Strategies Proven to Work
- 21 Shopify Marketing Strategies You Need to Know