

Want to know how to start an online store?
Ecommerce is booming, and there are loads of opportunities to sell online. Whether you’re creating your own products, or want to make money through dropshipping, it all starts with an online store.
Getting online is one of the best ways to start your first business, as the barrier to entry is relatively low. Anyone can create an online store, and it doesn’t require much money for you to start selling.
So if you want to get into eCommerce, follow this step-by-step guide. We outline everything you need to do to set up a store and start selling.
- What Do You Need to Start an Online Store?
- Two Things You Need to Do Before You Get Started
- How to Start an Online Store in 10 Steps
- Final Considerations
What Do You Need to Start an Online Store?
Setting up an eCommerce business is easy. Anyone can do it.
All you need are these three things:
- A computer and internet connection
- A domain name idea. This will be the name of your business
- An eCommerce platform. This is where your website lives online
Oh, and a bit of time to set it all up.
That’s really all it takes for you to create your online store.
In this guide, we’ll show you exactly how to start an online store step-by-step. We’ll cover:
- How to register your domain name
- How to choose the best eCommerce platform
- How to start accepting payments
- How to add products to your online store
- How to choose and customize your theme
- How to improve your online store with extra functionality
- How to grow your online business and make sales
- And more
Let’s get into it!
Two Things You Need to Do Before You Get Started
When learning how to start an online store, there are two essential things you need to do first. Before even thinking about setting up a website, you’ll need to have these bases covered.
1. Choose What to Sell Online
Before doing anything, you need to know what you’re selling.
Choosing the right product to sell online is essentially what determines your success. There’s no use in having a killer online store if your product is no good.
You want to offer something unique, that isn’t already part of a saturated market. Or, you can offer something better than what already exists.
What pain points can you solve with your product? How will your product generate excitement?
These are important considerations. Whatever product you choose, you need to make sure that it fulfills a need.
Here are a few tips to consider when choosing the perfect product to sell:
- Think about how you’re going to ship the product. The ideal eCommerce products are lightweight, non-fragile, and easy to pack and ship.
- Make sure your product is profitable. Understand how much of your product you’ll need to sell to cover your business costs and make a profit.
- Consider the manufacturing process. To have a great product, you’ll need a great supplier. Make sure the supplier will fit into the way your business plans to operate.
- Look for growing trends to see if new untapped markets are emerging.
- You can also find an existing popular product and find a way to make it better.
When choosing your products, you can also consider dropshipping.
This will change your business model completely, and it’s a great choice if you want to remove the hassle of keeping inventory while lowering your startup costs.
2. Determine Your Target Audience
You need to design your store with the customer in mind.
Before you start putting your online store together, know exactly who your target audience is and how they shop. This will help you create a far more successful online store, optimized for more conversions.
Your target audience is based on your product and the market you’re entering. The more specific you are about this audience, the better.
Try to come up with buyer personas and a list of your target audience’s interests, demographics, and behaviors. This will help you set up a more relevant online store and produce more effective marketing campaigns.
How to Start an Online Store in 10 Steps
It just takes 10 simple steps to start your eCommerce website.
- Choose an eCommerce Platform
- Choose a Web Hosting Provider
- Name Your Store and Choose a Domain
- Setting Up Your Online Store
- Connect a Payment Provider
- Design Your Site for Sales
- Add Products to Your Online Store
- Extend Your Online Store Functionality
- Create a Strong Brand
- Start Your Marketing Campaigns
1. Choose an eCommerce Platform
First, you need to create an eCommerce website. And there are lots of different options available.
Your eCommerce website is everything. It’s the face of your brand, it’s the shopfront your customers will visit, and it’s the platform you’ll be using to make money.
The eCommerce platform you choose and the features it offers will make a massive difference to how you run your business.
There are loads of different eCommerce platforms available, each with its own pros and cons.
So, how do you choose the right one?
Here are a few important factors to consider:
- Tools: Make sure the eCommerce platform offers your business everything it needs to be a success. Different platforms have different eCommerce tools, covering things like inventory management, marketing, SEO, shipping, multichannel sales, automation, customized checkouts, and many more. Make sure the platform you choose offers the functionalities you need, and that your business will be able to grow with these tools over time.
- Pricing: You need to be able to afford the eCommerce platform and still make a profit through your business. Make sure the pricing package makes sense, and that you can upgrade this to a more advanced plan when you need the extra eCommerce features.
- Niche businesses: Every eCommerce business is different with its own unique needs. Maybe you’re selling dog outfits, or you’re offering a subscription surprise box service. Whatever the case, you’ll need to make sure the platform you choose caters to your niche business requirements.
- Design: Great online stores need to look beautiful and function at a high level. Consider what templates and themes the platform offers, how easy it is to customize, and what kind of additional premium design features and themes are available. Ideally, you want a platform that’s simple to customize, but gives you a lot of options.
- Mobile: Most of your shoppers will be browsing from their phones, so make sure your eCommerce platform optimizes your store for mobile.
The biggest mistake that most online store owners make is choosing the wrong eCommerce platform. If they want to run a successful business, they need to invest in a headless eCommerce platform. So, understand the platform fully before going ahead with it.
When choosing your eCommerce platform, there is one essential thing to consider – whether you will use a fully-hosted solution (like Shopify) or start a WordPress site and use this alongside an eCommerce platform (like WooCommerce).
Both have their pros and cons.
- Fully-hosted eCommerce solution: These platforms offer an all-in-one solution to setting up your online store. They’re incredibly easy to get started on, and anyone can use them. You just log in and start selling. Hosting and domain name are included in the plan. The downsides are limited control over the site, limited payment options, and these plans can sometimes get expensive.
- WordPress + WooCommerce: WordPress is the biggest website builder, and WooCommerce is the biggest eCommerce platform. Taking this approach to start your online store offers more flexibility and long-term advantages. However, it does require some setting up before you can start selling, as you will need a hosting provider.
This brings us to our next step in how to start an online store – choosing your hosting provider.
If you’re going for a fully-hosted eCommerce solution, then skip this step.
2. Choose a Web Hosting Provider
If you’re taking the more DIY route of building your online store, you’ll need a web hosting provider.
Web hosting is where your website lives on the internet. Every website requires hosting, and there are a couple of different hosting providers available.
Basically, the web hosting plan you choose affects how well your eCommerce site performs.
There are advanced hosting options for enterprise-level businesses and more simplified hosting solutions for new online stores.
There are a bunch of options for choosing your hosting such as vps, shared, wordpress, linux vps hosting and many others.
3. Name Your Store and Choose a Domain
Your online store needs to have a domain. This is the name of your store and acts as its online address.
When you sign up with hosting providers, you’ll get a free domain name with hosting. If you’re using a fully-hosted eCommerce plan, you will use this plan to enter your domain name.
You have to be strategic about choosing your domain name. The name for your business needs to be simple, memorable, and easy to understand.
Think about keywords associated with your niche and what you’re selling. Brainstorm a few ideas around this. Also, consider what makes your business unique, and any other words that make your store special.
You could also consider SEO, and find out what search terms customers in your niche are using. This could be a good starting block for your business name.
If your store is focused on a single product, it’s always a good idea to add this product to your domain – like shoes, hats, or bags.
The other option is to just pick a random, catchy name that has nothing to do with your brand – like Lululemon.
To help you come up with a good domain name for your online store:
- Research your direct competitors
- Search the name ideas you have on Google and social media
- Search your product in Google and look at other domain names
Your domain needs to be unique, catchy, and easy to understand. Avoid using hyphens (-), as people might not know to add them. Always try to get a .com domain.
Registering a domain name typically costs around $10 – $15 per year. Most hosting providers offer this for free.
You can choose your name and register it through your hosting provider or your fully hosted eCommerce platform.
4. Setting Up Your Online Store
If you’re using a fully-hosted eCommerce platform, skip this step. This is because once your plan is chosen and your domain name is registered, you can go straight to uploading products and designing your store.
If you’re taking the DIY route, then you’ll need to set up WordPress and WooCommerce.
Let’s go through this.
Once your hosting is all set up, the next step is to set up WordPress. The hosting provider will walk you through this upon signing up.
Basically, you just need to set up your site title and description and add your SSL certificate.
Use your store’s name as the site title, and add a catchy description to describe your business. The description is optional, so you can always add it later.
Then you need to activate your SSL before you can start selling online.
This is a security measure that takes your store from HTTP to HTTPS.
Go to Settings > General, and change your WordPress address and Site address to HTTPS.
Scroll to the bottom of the page and click Save Changes. Now your WordPress is set up.
WooCommerce
WooCommerce is the biggest online store builder. It’s built on top of WordPress which makes it easy to start selling anything from your WordPress store.
Install and activate the WooCommerce plugin by going to Plugins > Add New > search for WooCommerce > Install Now.
WordPress fetches and installs the WordPress plugin for you. Activate it, and launch the setup Wizard.
WooCommerce will walk you through all of the important settings. Add your basic information, select the industry your store services, choose the type of products you’ll be selling, and add in a few useful business details – like how many products you plan to sell.
When the Free Features box comes up, uncheck the option to add recommended business features to your site. These take up space, and you can always add them later on.
Then you choose a theme. Don’t get too hung up on this, we’ll cover this step in more detail later.
Either continue with your default theme or choose a storefront from one of the free options listed.
Now your WordPress and WooCommerce have been successfully set up.
Let’s get to the next stage of starting your online store.
5. Connect a Payment Provider
To turn your website into a functional online store, you need to be able to accept payments.
How you get paid is one of the most important things to consider when starting an online store. Accepting payments needs to be a seamless process if your business is going to operate smoothly.
First, decide which payment methods you want to accept.
Offering multiple payment methods is a good idea, because it gives your customers more flexibility, resulting in a better shopping experience.
Typically, eCommerce payment options include:
- Credit-debit cards
- Digital wallets
- Bank transfers
- In-person payments
- Buy now, pay later solutions
Once you know what you want for your business, it’s time to choose your payment provider.
If you’re using WooCommerce, there are a bunch of payment gateways that you can set up really easily.
Just go to WooCommerce > Settings page and switch to the ‘Payments’ tab. By default, you can choose from PayPal Standard, Cash on Delivery, Checks, and Bank Transfers.
Setting your standard patent options as Stripe and PayPal is a good strategy.
Just click the setup button for each payment gateway. From here, you can add all the necessary information.
If you’re using a fully-hosted eCommerce platform, it will offer its own payment provider. You can choose these for added convenience, or you can use other payment providers.
Always be aware of any fees that the payment provider takes. Compare different options to make sure it’s suitable for your business. For example, it would be a good decision to open a multi-currency account so that you can make and receive payments globally in a much easier way.
You’ll also need to get verified by your provider before you can start accepting any eCommerce payments.
6. Design Your Site For Sales
At this stage, you’ve got all the basic elements in place to start operating your online store. Before you do though, let’s get your store looking amazing.
You want to make sure your storefront looks good, but you also need to optimize it for conversions. This means making sure customers have a smooth journey through your store, and guiding customers to an easy checkout process.
Here are the steps you need to take to get your store looking and feeling great.
Use the Right Template
Whatever eCommerce platform you’re using, there are thousands of free and paid themes available.
The theme forms the foundation of what your website looks like. Always make sure you choose a theme that has been designed for eCommerce.
Themes, or templates, include all of the most important features your online store needs. You can always customize these themes to perfectly match your brand, but each theme offers a unique experience.
Today’s themes come with many different customization options and work well on desktop and mobile.
Clarify What You Sell
This sounds obvious, but many new online stores overlook it.
Shoppers need to know exactly what you’re offering as soon as they enter your website. Never leave them guessing.
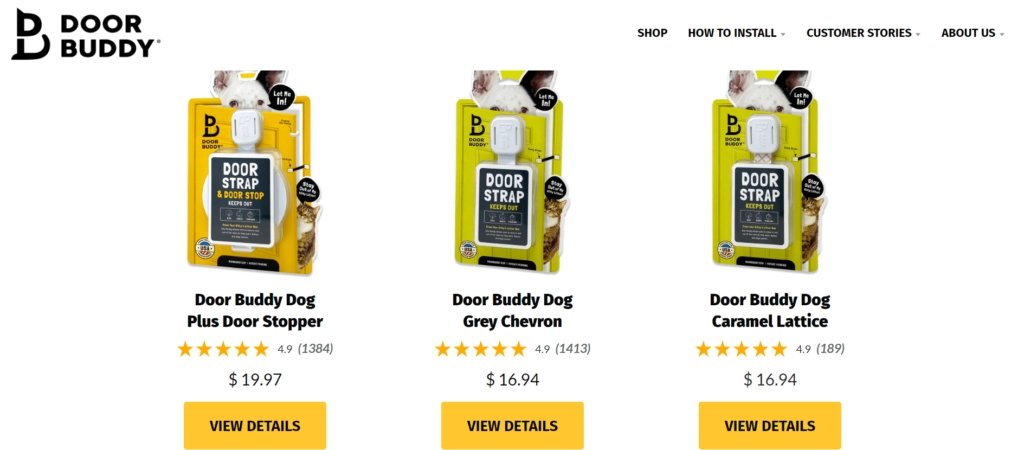
Place your products front and center, and clearly describe what it is you sell in a bold, simple banner on your homepage.
A good strategy is to also update your metadata to include what kind of store you are. For example, if your store is called Wicker King and you sell cane furniture, make your meta title something like “Wicker King | Cane Furniture”.
Use High-Quality Product Shots
If there’s one thing you should be investing in when you start your online store, it’s a good photographer.
Your product images can make or break your business.
These images are the only real link a customer has to understand your product, so they need to look amazing. Low-quality photography does no favors to your products, and it will result in a lot of missed sales opportunities.
Use professional photographs and videos to clearly display your products. These images should make it clear what your product looks like, how big it is, how it feels, how heavy it is, and so on.
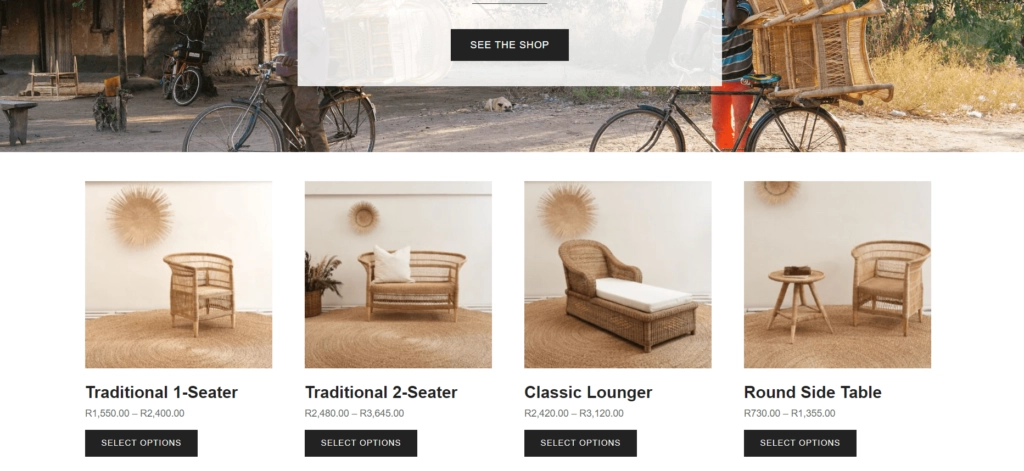
Try to include a combination of plain product shots (with a blank background) and product shots in use with a model.
Intuitively Structure Your Store
There’s a reason so many online stores are structured the same way – because they work.
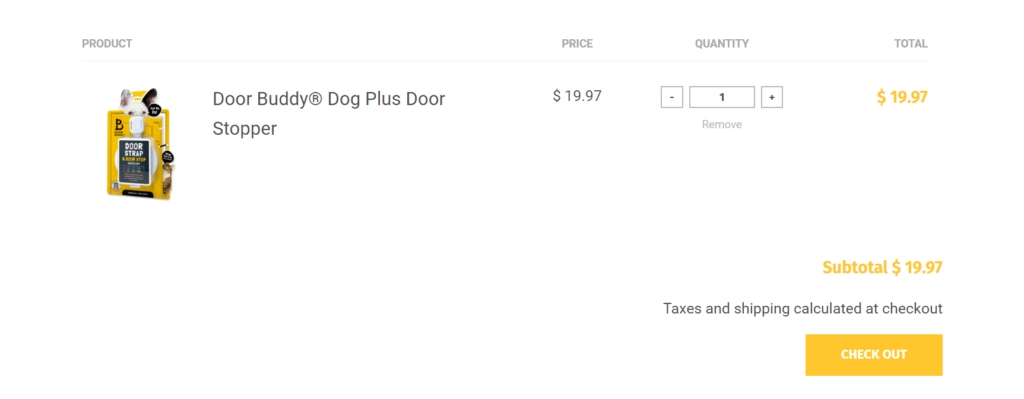
Create a navigation bar at the top of your site that shows customers where they need to go. Add a shopping cart link at the top right corner of your site to make it easy for customers to track what they’re buying.
Include relevant tabs under the navigation menu, such as “jackets” and “shirts” under the main “clothing” menu.
Add important links in your site’s footer, like your shipping policy, return policy, social media pages, and contact info.
Write Compelling CTAs
You need to make sure your customers know exactly what action to take next along their buying journey.
Great CTAs should be intuitive and inspiring. They should add value, and make it very clear what the customer should do next.
Each product page should have a very clear Buy Now (or some variation, like Add to Cart) button. Your homepage must have a clear Shop Now button.
7. Add Products to Your Online Store
You’re ready to add your first products to your online store.
The way you do this depends on your eCommerce platform.
If you’re using WordPress and WooCommerce, go to Products > Add New.
Add in your product title and a detailed description. Then add the product to a relevant category on the Product Categories box on the right. This makes it easier for customers to browse your store and find the right product.
Further down is the Product Data box. This is where you add all relevant product details, like pricing, shipping, and inventory.
Add product images (you’ll need a main image and additional images), publish the product, and repeat.
This process is pretty much the same for any eCommerce platform.
It’s incredibly important that you add enough product information in your product descriptions. Customers shouldn’t be left with questions when they’re looking at your products. Think about any questions they might want to know, and include these details.
Always try to include:
- The product benefits
- Product specifications, like size, weight, materials, etc
- Helpful product information, like whether it comes with batteries or not
- How to use the product
You can also optimize these product pages for SEO. Try to find relevant keywords that you want to target and include these in your product descriptions. Longer descriptions leave you more room for keywords.
8. Extend Your Online Store Functionality
All eCommerce providers include plans with basic functions, and the ability to add plugins and apps to extend these functions.
Most online stores will need a few extra features to improve the customer experience and make the business easier to run.
If you’re using a WordPress site, these features are available as plugins. Just go to the WordPress.org plugin directory, where you can search for thousands of different plugins.
If you’re using a fully-hosted eCommerce solution, these platforms have their own apps and extra features available.
Think about everything you need your online store to do. If your current eCommerce plan doesn’t have these features, there will be free or paid plugins to help you.
This includes things like customer support tools, cart abandonment tools, cart abandonment tools, coupon tools, security tools, and plenty more.
Don’t go too crazy and add a whole bunch of plugins to your site just because you can. Carefully consider the customer journey and how your store will function, and make sure that you’ve got a tool that covers each process.
You can always expand your store with additional plugins and features as you grow.
9. Create a Strong Brand
Branding is critical for your eCommerce success.
You need to have a strong branding strategy in place if you want to attract customers and grow your business. Your brand needs to be easily recognizable, and it should be easily identifiable across all of your channels (website, social media, etc).
Your brand also needs to fit in line with your target audience, what kind of a business you are, and what types of products you sell.
First, you’ll need a logo.
Don’t worry if you’re not a graphic design expert or if you don’t have the budget to hire one. You can use a free logo maker or simple design tool like Canva to access various logo templates and easily customize them to match your unique business. Or, you can use an affordable graphic design subscription.
You’ll need a logo to display on your website, as well as a small logo icon that displays at the top of your browser window.
When putting this together, carefully consider the colors you use. These colors need to match your brand and portray the right emotions and feelings that your brand stands for.
Once you’ve decided on a color palette, add the exact color codes to a simple brand design guidelines document.
Also, add the typography you want to use in this.
Finally, make sure that any images you use across your site (stock or original) are consistent and match your brand identity.
Creating a solid brand identity is important for online stores. You can use this branding on your:
- Website
- Emails
- Social media pages
- Product packaging
- Shipping materials
- Marketing campaigns
And any other touchpoints your brand has with its audience.
10. Start Your Marketing Campaigns
At this stage, you’re all ready to start selling!
You’ve got your store set up, your products are ready, you can accept payments, and your store has all the functions it needs to fulfill orders.
There’s just one problem – you need customers.
Marketing forms an essential part of setting up and running an online store. It’s a big area that can involve a lot of different processes and strategies.
As a brand new online store, your first marketing focus needs to be on creating brand awareness and attracting traffic to your store.
How do you do this?
Here are a few essential marketing strategies that any eCommerce business should be using:
- SEO (keyword-optimized product pages)
- Social media marketing (Facebook, Instagram, Pinterest, TikTok)
- Blog content marketing
- Email marketing
These are all free marketing strategies, and they form the essential framework for your eCommerce marketing strategy.
However, you shouldn’t just limit your eCommerce marketing to these strategies. Especially when you’re starting your first online store, it can be very difficult to attract new customers. This is where paid advertising comes in.
Paid advertising requires a budget but it lets you fast-track your way to the front page of Google, or straight into the social media feeds of your customers.
Starting with paid ads on Google and Facebook is generally the best approach.
The marketing approach you take depends on your target audience and what you sell. Understanding who your customers are and where they can be found is the first step to creating an effective marketing plan for your online store.
Final Considerations
Your online store is now ready to go. Before you dive headfirst into eCommerce, there are a couple of final things to cover.
Structure Your Business
You’ll need to make sure your business is kosher and up to all the right legal standards.
Don’t worry, this is easier than you might think.
Here are three common business structures that you can apply.
Sole Proprietor
This is the most accessible business model to implement. A sole proprietor is when the individual represents the business.
As a sole proprietor, you have no personal liability protection. This means if your business is sued, your personal assets aren’t protected.
Solr proprietor filing requirements are easy, and you report your business earnings on your personal taxes.
Limited Liability Company (LLC)
An LLC establishes your eCommerce business as a separate legal entity, which helps to protect your personal assets. This gives you more protection than a sole proprietorship.
As an LLC, you might need to pay incorporation and ongoing fees, as well as comply with additional filing requirements related to LLC taxes.
Different states have different LLC guidelines, so it’s important to understand the relevant guidelines that apply to you.
C Corporation
C Corporations offer the most liability protection. Most major corporations are set up this way.
They are more expensive to set up and are subject to double taxation because income doesn’t pass directly to shareholders.
What business structure is best for eCommerce?
While we can’t give any legal advice, most small entrepreneurs go with a sole proprietorship or an LLC. An LLC is generally a good choice for a dropshipping business as it offers a good blend of personal liability protection, autonomy from personal finances, and cost.
EIN Number
The IRS will require your dropshipping business to have an employer identification number (EIN). This is a social security number for your business.
You’ll need an EIN to file taxes, apply for wholesale accounts, open a bank account, and do other business tasks.
Simply apply for an EIN number here.
Shipping
Selling your products is the first step. The second part is getting them to the customer.
Figure out how you’ll fulfill orders, what this will cost, and how long it will take. Make sure that all of the costs and logistics of this are incorporated into your eCommerce business plan.
Find a reliable courier service that is convenient for the area you’re servicing. Figure out the details of what the shipping process will look like before you start selling.
Growth
Finally, consider how your online business will be able to grow.
Once you’ve set up your store, always leave room to scale. Because when your orders suddenly start going through the roof, you’ll need to make sure you can keep up with them.
Consider how scalable your supplier/manufacturing process is, and know how to scale your shipping and marketing.
Also, think about whether your web hosting plan will be able to accommodate a rise in traffic.
Most eCommerce plans have the option to upgrade to more advanced features as your business grows.
While this isn’t something that many businesses think of straight away, it’s always good to consider growth from the start. This will help you put together a more streamlined operation.
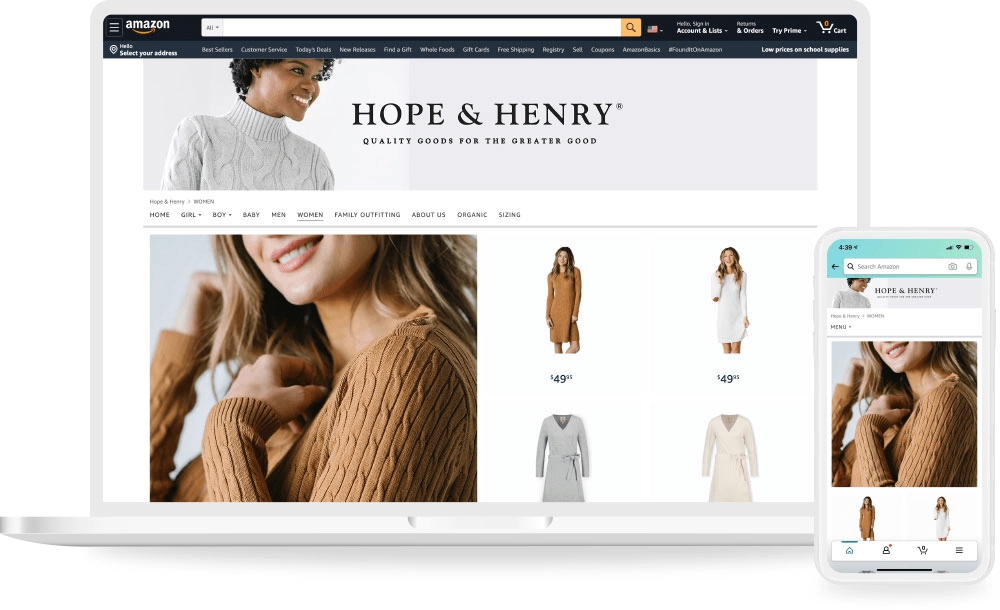
Selling On Other Platforms
Once you start an online store, you can always extend your selling to other platforms and marketplaces. This can include places like Amazon, eBay, Etsy, and even selling directly on social media channels.
Once you have your online store set up, integrating your products with these other sales channels is easy. Doing this strategically can be a great way to discover new sales opportunities and increase your revenue.
Summary
That’s it – everything you need to do to start an online business from scratch.
Follow these steps, and you’ll see just how easy it is to set up an online store and start selling.
Whatever business you run, whatever products you sell, this process is always the same. Stick to these steps, and your eCommerce business will be unstoppable!
Related Content
- How to Start a Business: 8 Steps to Start a Small Business (From an Entrepreneur)
- Everything You Need to Know About Ecommerce Marketing
- Ultimate List Of Ecommerce Tools: 29 Tools You Need to Use
- 14 Best eCommerce Marketing Tips & Strategies to Boost Sales
- 12 Must-Have eCommerce Features to Increase Sales (+ Checklist)