
Are you considering running a Halloween contest?
As one of the biggest holidays of the year, you should be!
If you’re on this page, you’ve likely already decided, so I won’t beat around the bush.
Let’s get down to it immediately!
This article gives you a complete Halloween contest strategy from beginning to end.
If you have any questions, leave them in the comment section and I’ll get back to you!
Decide what you want to give away in your Halloween contest
There is no limit on the industries which can take advantage of Halloween. Whether you’re a bank or a bookstore, if you have enough creativity you can make it work.
For the purposes of this article, I’ve created an entire Halloween contest strategy built around a photographer I completely made up: Jennifer Snope.
Don’t worry, the best practices and strategies which work for the photography industry will also work for yours.
What are you thinking of giving away?
Looking for contest prize ideas?
Check out our comprehensive lists of contest inspiration!
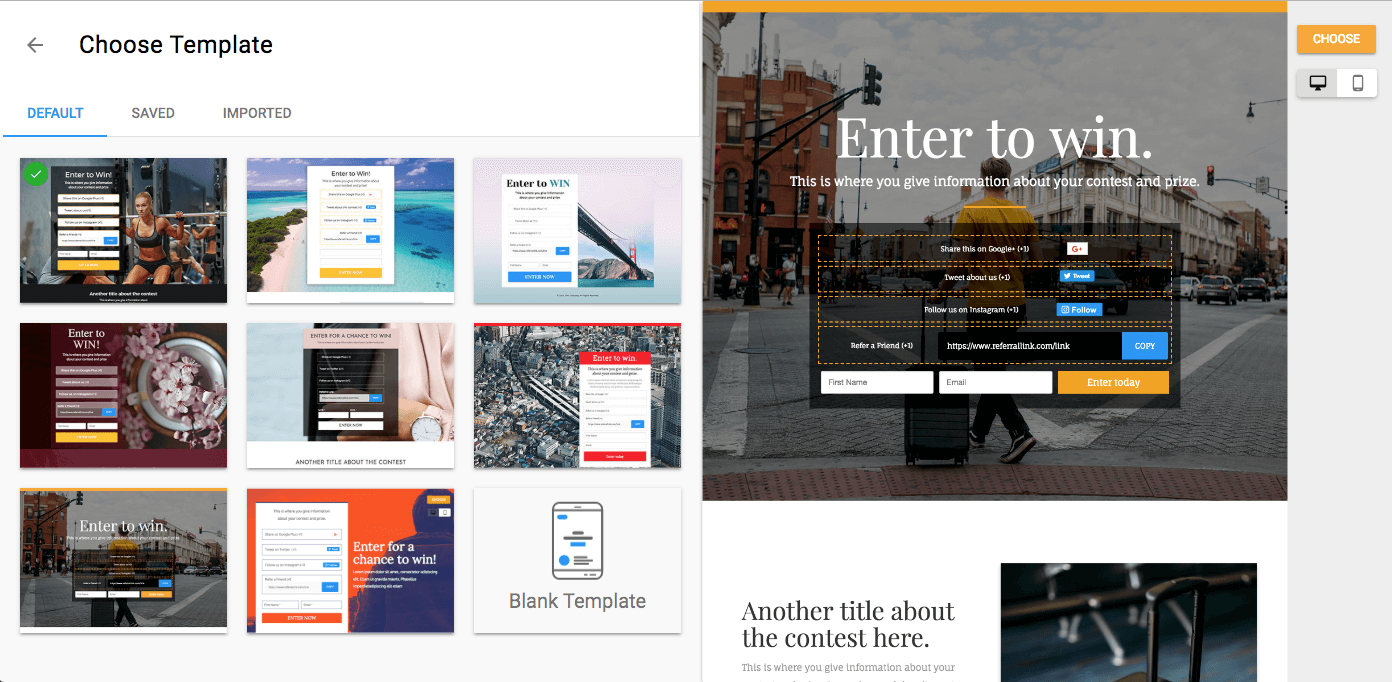
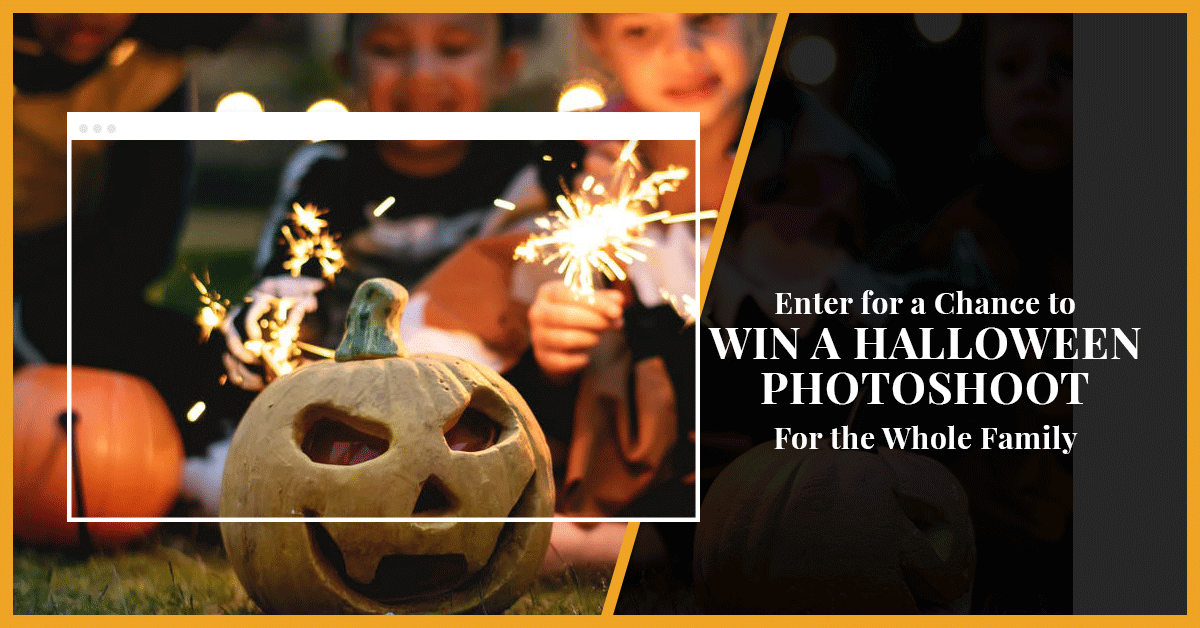
Create your Halloween contest page
This is the page you’ll be directing people to, so it needs to look great and entice people to convert.
Your first step is to select the template which will be easiest to adapt:
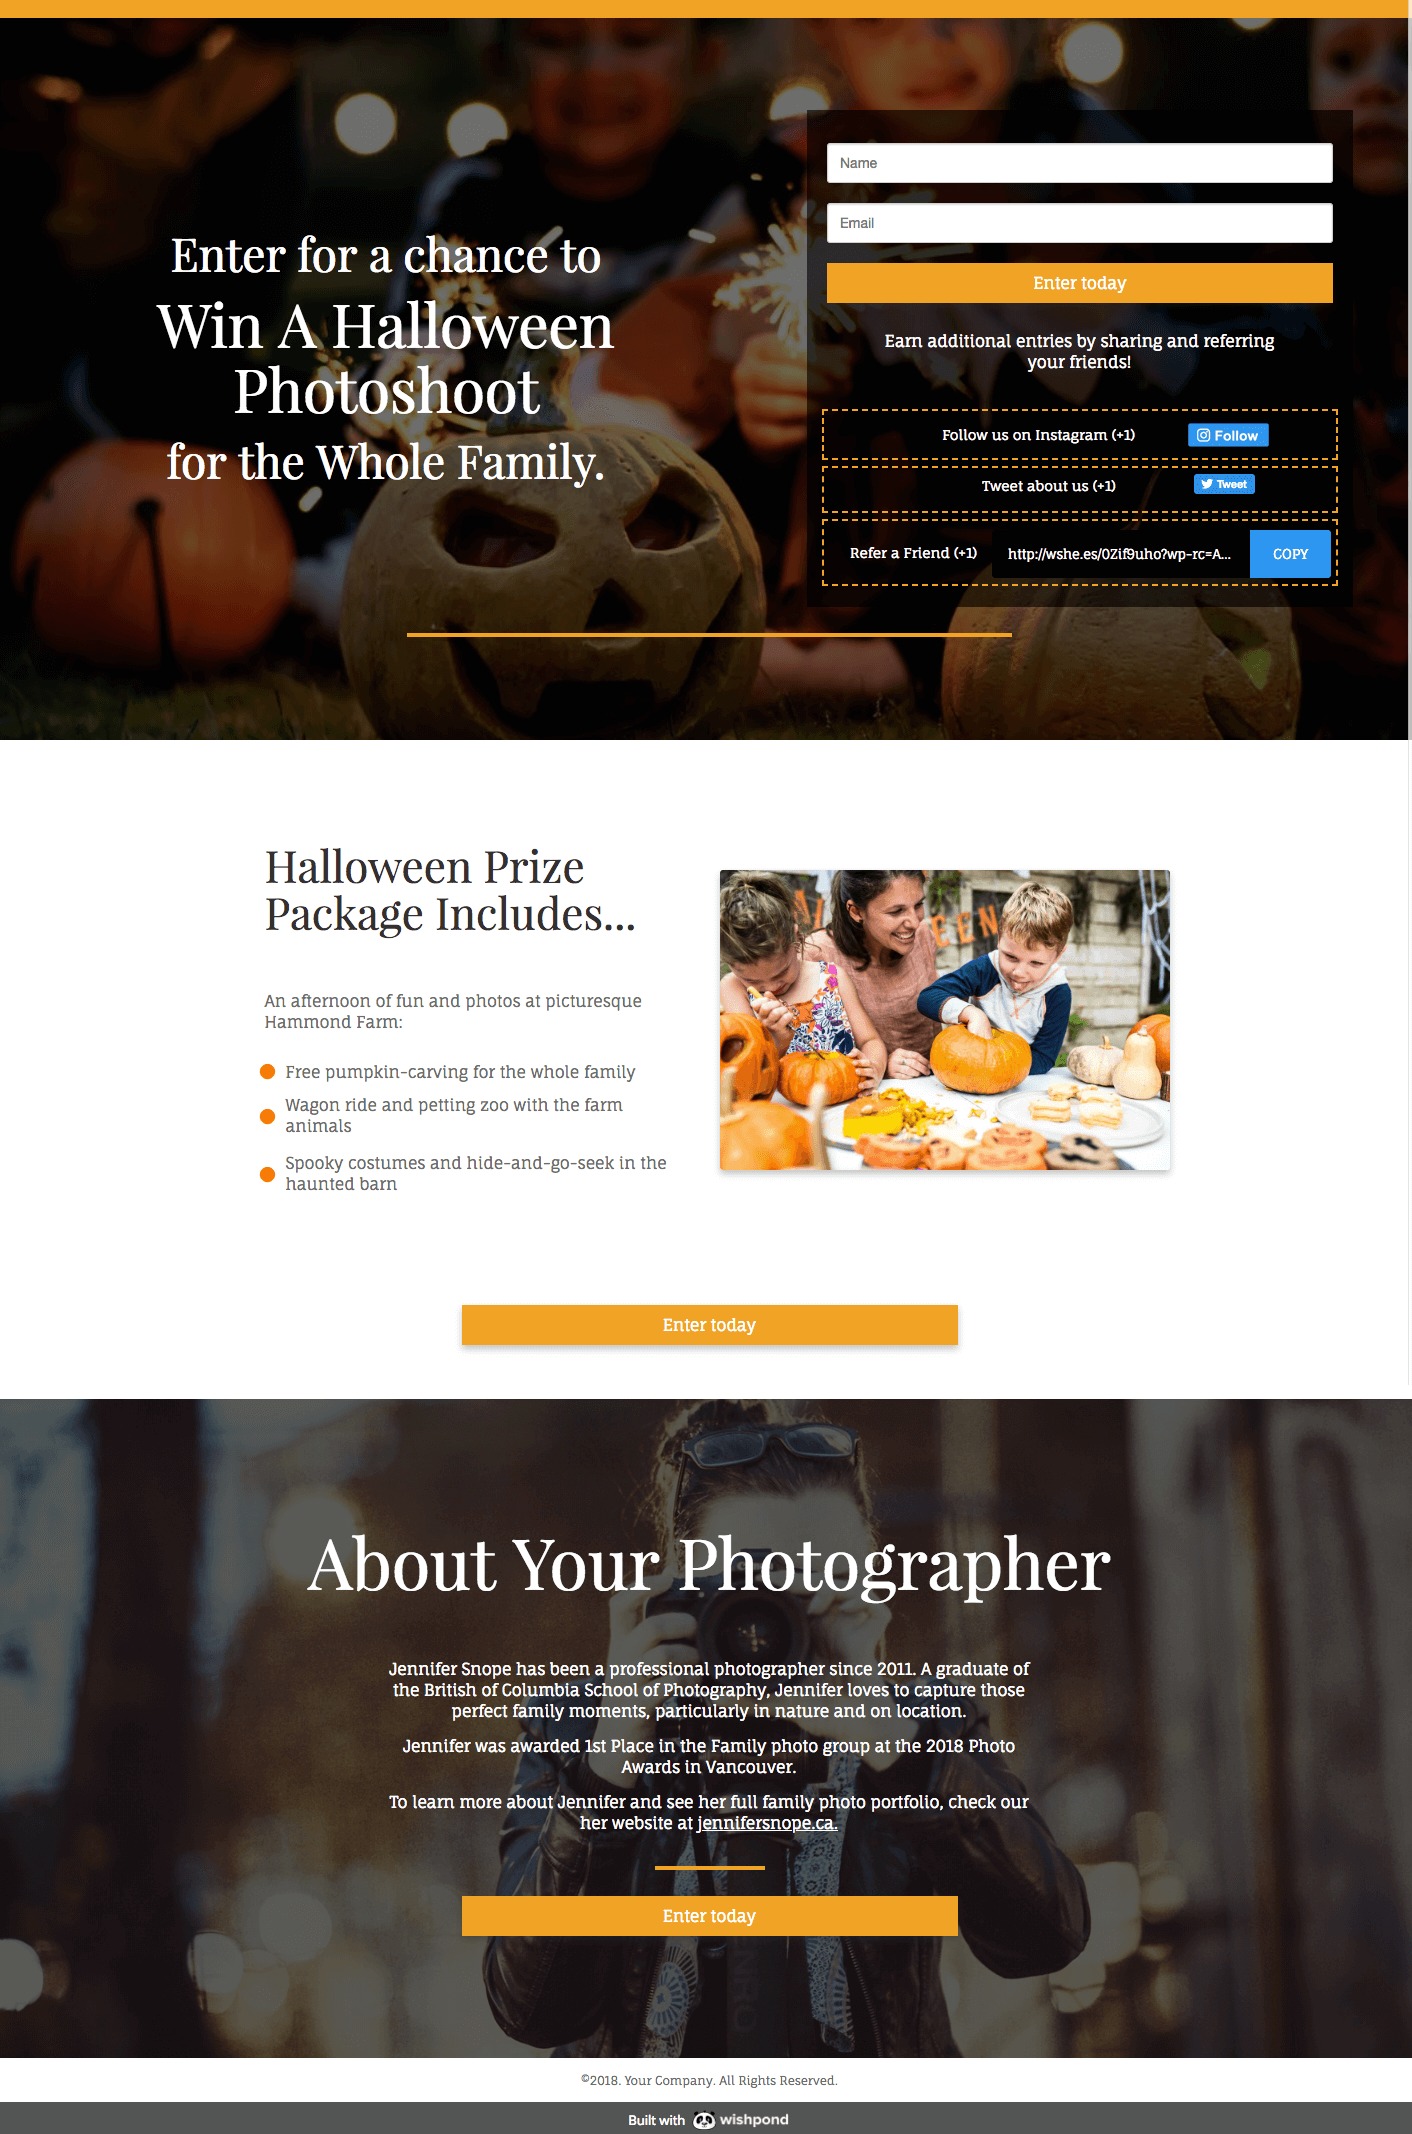
My recommendation would be to use a bonus entry contest. This is because a bonus entry contest, which rewards entrants with additional chances to win when they share, tends to have more entrants than any other type of contest.
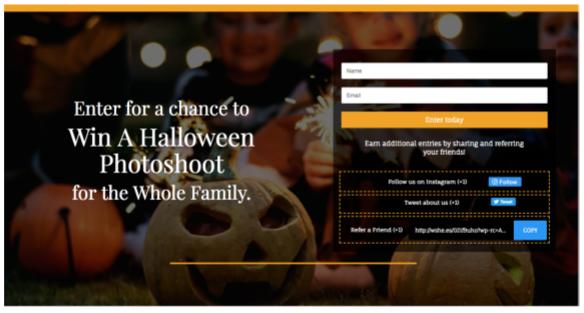
Here’s a Halloween contest page I created using one of Wishpond’s easy-to-use templates:
Click the thumbnail below to see the full contest page:
To start creating your Halloween contest today…
Start a 14-day free trial with Wishpond, or speak to a Wishpond rep about our platform, our contest tools, and how we can help you grow your business.
Create website add-ons to drive traffic to your Halloween contest page
The easiest and cheapest way to drive people to your Halloween contest is to find your highest-traffic pages (your homepage, a blog article, etc) and send your visitors to your contest page.
For example, let’s say that you get 100 daily visitors to your website. If you add a Wishpond hello bar to your homepage, 10 of those people will click through on the “learn more” button to take advantage of your Halloween offer.
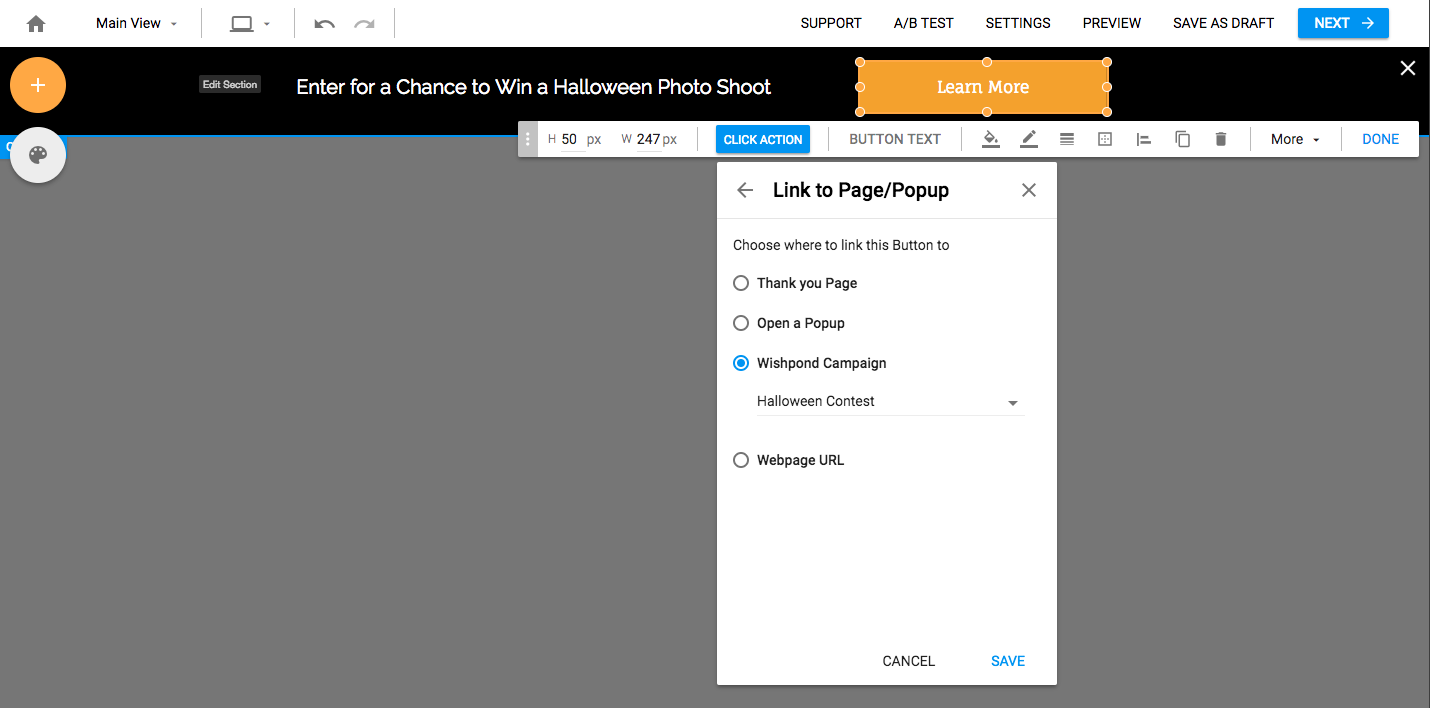
Hello Bar:
To create a simple Hello-bar (it takes about 2 minutes), simply choose the template, change the copy, and select “Click Action” on the button. Then direct people to your existing Halloween contest campaign:
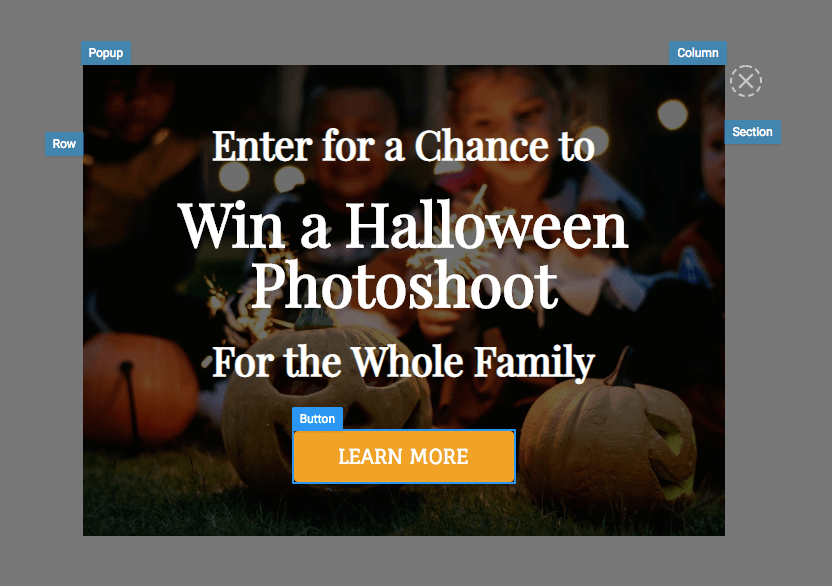
Popup:
To create a popup which will only show after visitors have been on your website for a period of time, choose your template, change the background image and button:
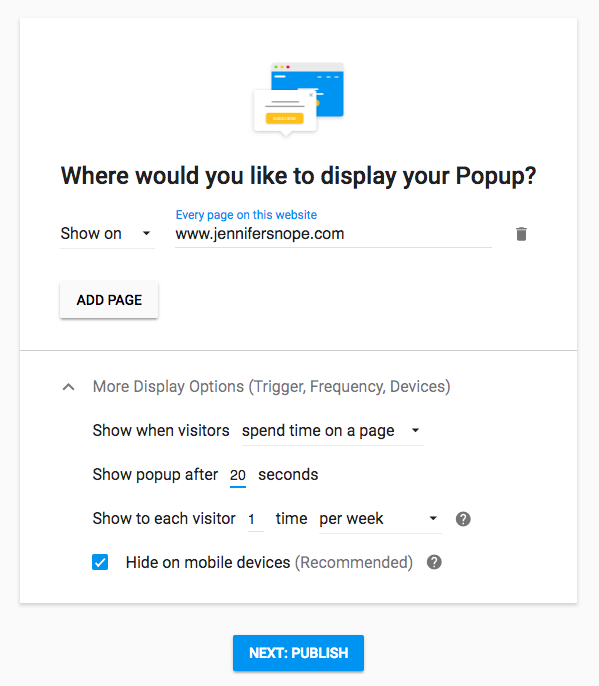
Then click “Next” and choose the page on which your popup will show, as well as how you want it to be triggered. For a timed popup, choose “Show when visitors spend time on a page. Show popup after 20 seconds.”
Note: You may have noticed that I’ve used the same colors, font and messaging across the whole campaign, from contest page to popup. This kind of consistency is best practice.
To start creating your Halloween popups and hello bars today…
Start a 14-day free trial with Wishpond, or speak to a Wishpond rep about our platform, our list-building tools, and how we can help you grow your business.
Create a Facebook Ad campaign to drive traffic to your Halloween contest page
Your own website traffic will only get you so far. To have a truly successful Halloween contest, you’ll need to shell out a bit of dough.
Luckily, Facebook Ads offers the largest audience of prospective customers a marketer could ever dream of.
And the targeting capabilities allow you to focus, exclusively, on people how are likely to buy from you down the line.
Let’s get rolling with creating your Halloween contest’s Facebook ad campaign:
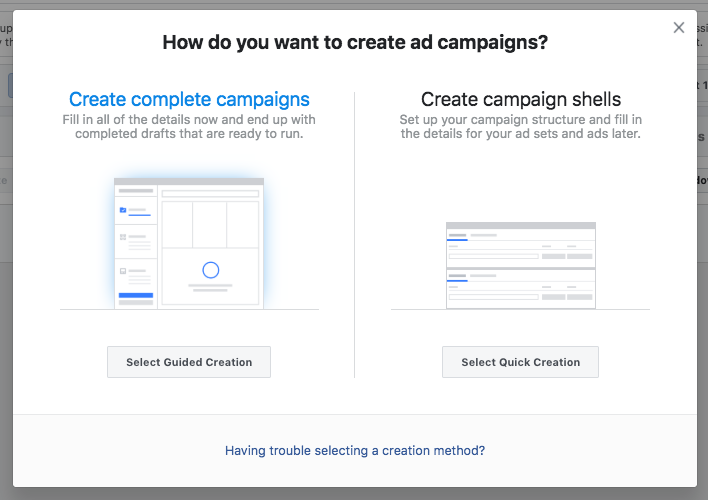
Step 1: Head to Facebook Ad Manager and create a new ad campaign. Click the guided option:
Step 2: Select your ad objective:
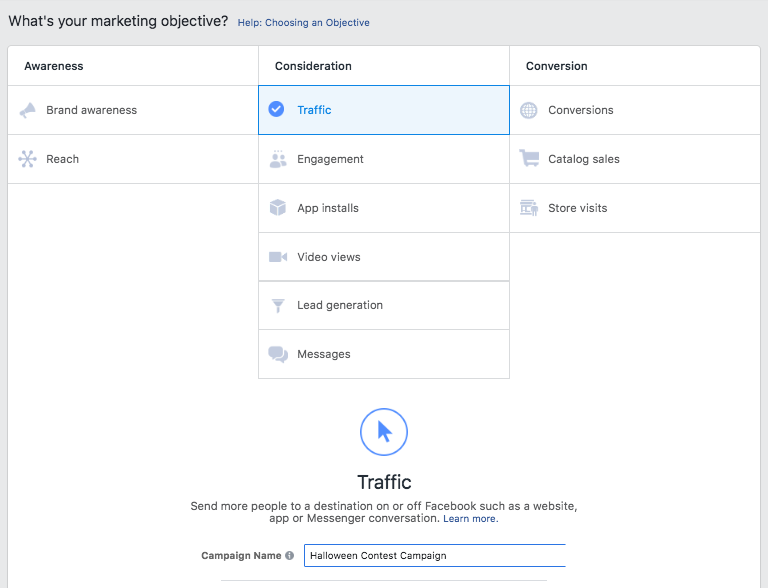
My recommendation would be select “Traffic” as your campaign objective. This means you’ll only pay when someone clicks.
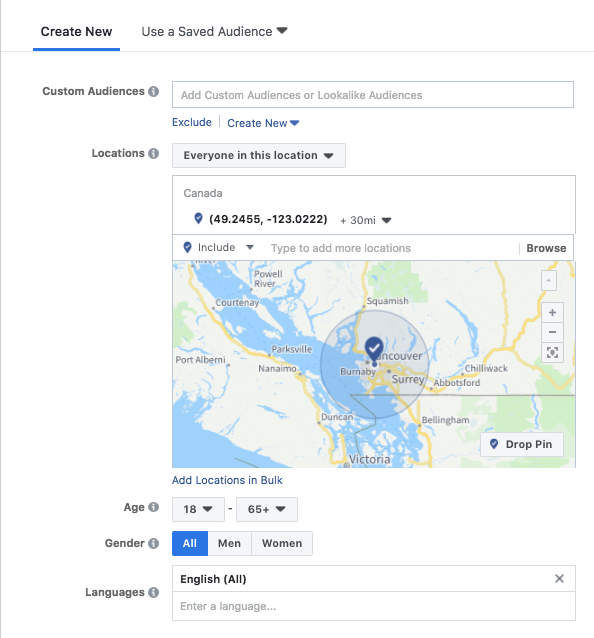
Step 3: Choose your target audience’s location:
If you’re a local business, my recommendation is to drop a pin, rather than use Facebook’s built-in city selection. It makes it easier to get your distances right.
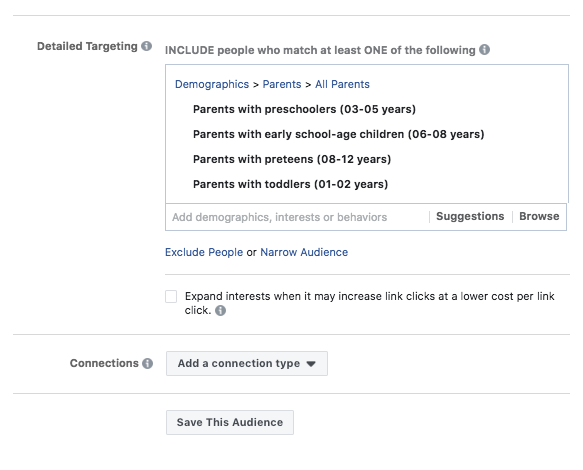
Step 4: Choose your target audience’s demographics:
In the case of the Halloween contest example I’ve created today, I’ll target, exclusively, parents of children.
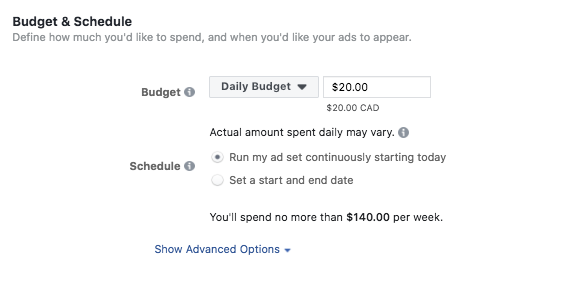
Step 5: Choose your budget:
This is going to differ for every business, based on your average customer value as well as how successfully you’ll be able to turn contest entrants into customers. My recommendation would be to go no less than $20/day. And remember, you only pay when someone engages with your ad.
Step 6: Create your Facebook ad image:
You want to keep consistent with your Halloween contest page as well as your website add-ons. Something like this:
Step 7: Write your ad copy:
In this step, you want to focus on the value of your contest prize. Ultimately, nobody’s going to click on an ad unless they see value for themselves in doing so.
Luckily, we’re able to target, exclusively, your target market, but even so…
Here’s the ad I created for the hypothetical Halloween contest example:
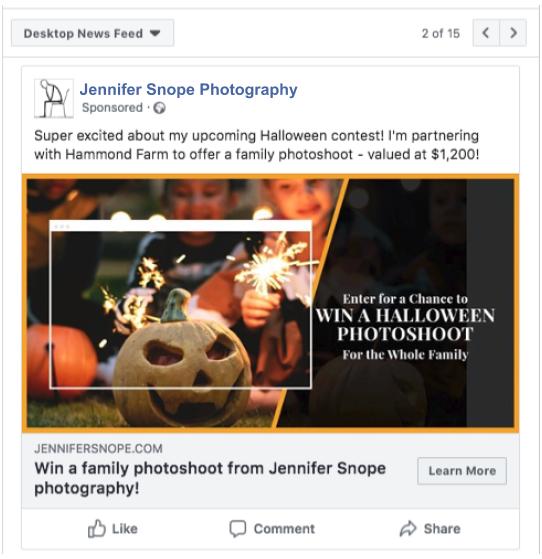
Notice I’ve focused on the dollar value of the contest prize, as well as kept my design, messaging and color-scheme consistent from the ad to the contest page. Again, consistency is best practice.
Confirm and launch your Halloween contest ad!
Further reading on Facebook ads for your contest:
If you really want to dive into creating a successful Facebook ad campaign for your Halloween contest, check out my guides: “How to Ensure a Successful Online Contest with Facebook Ads,” and “How to Run a Facebook Contest or Facebook Sweepstakes.”
Create an Email Campaign Which Turns Halloween Contest Entrants into Customers
Before you can hit “Start!” on your Halloween contest, you need to have a strategy for how you’re turning entrants into customers.
And that’s where email comes in.
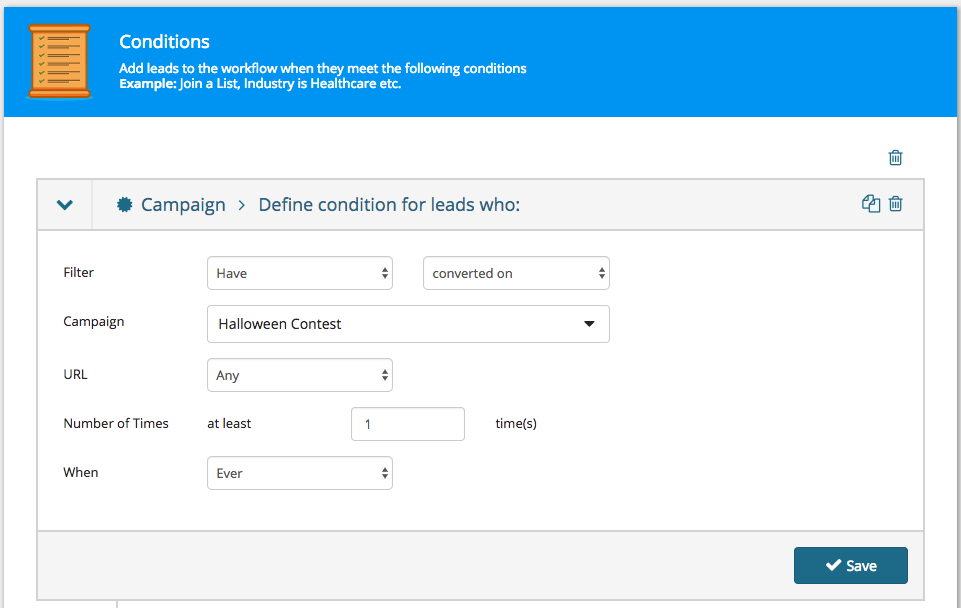
First and foremost, you need an auto-responder.
This is the email that’s sent as soon as someone converts on your Halloween contest page.
It should thank them for entering and prompt them to share the contest with their network (remind them of the bonus entry function).
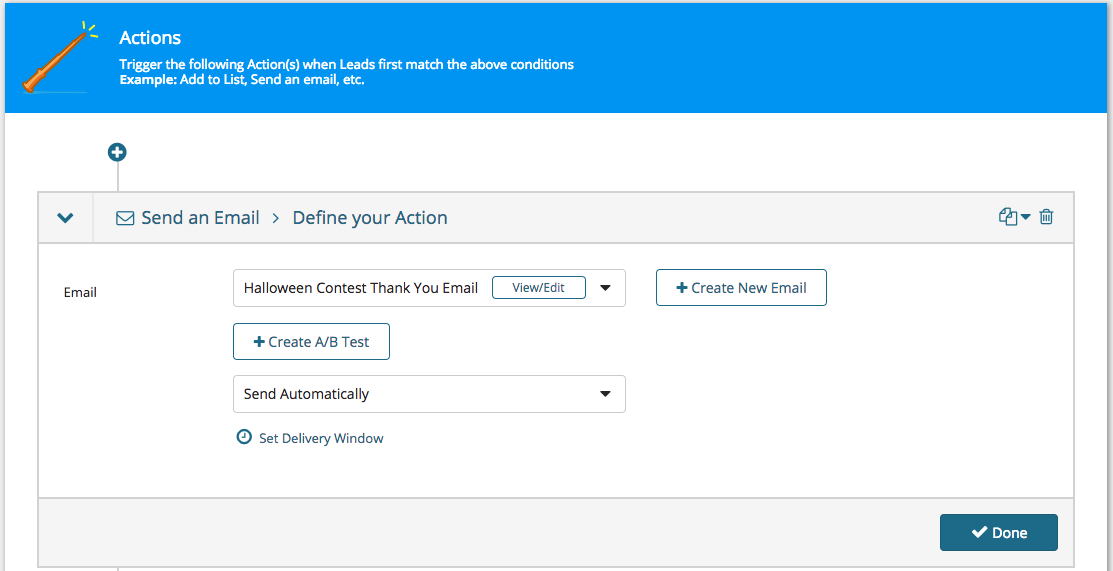
To set up an auto-responder using Wishpond, simply select “email automation” and determine the conditions for your email to send (in this case, whenever someone converts on your contest page):
Then, select the email you want to send (the “action” triggered when the conditions above are met):
Next, you need to send an email after the contest is over which drives entrants to buy despite losing:
For this, use Wishpond’s newsletter tool.
Here’s the email I’ve written for the hypothetical Halloween photoshoot contest:
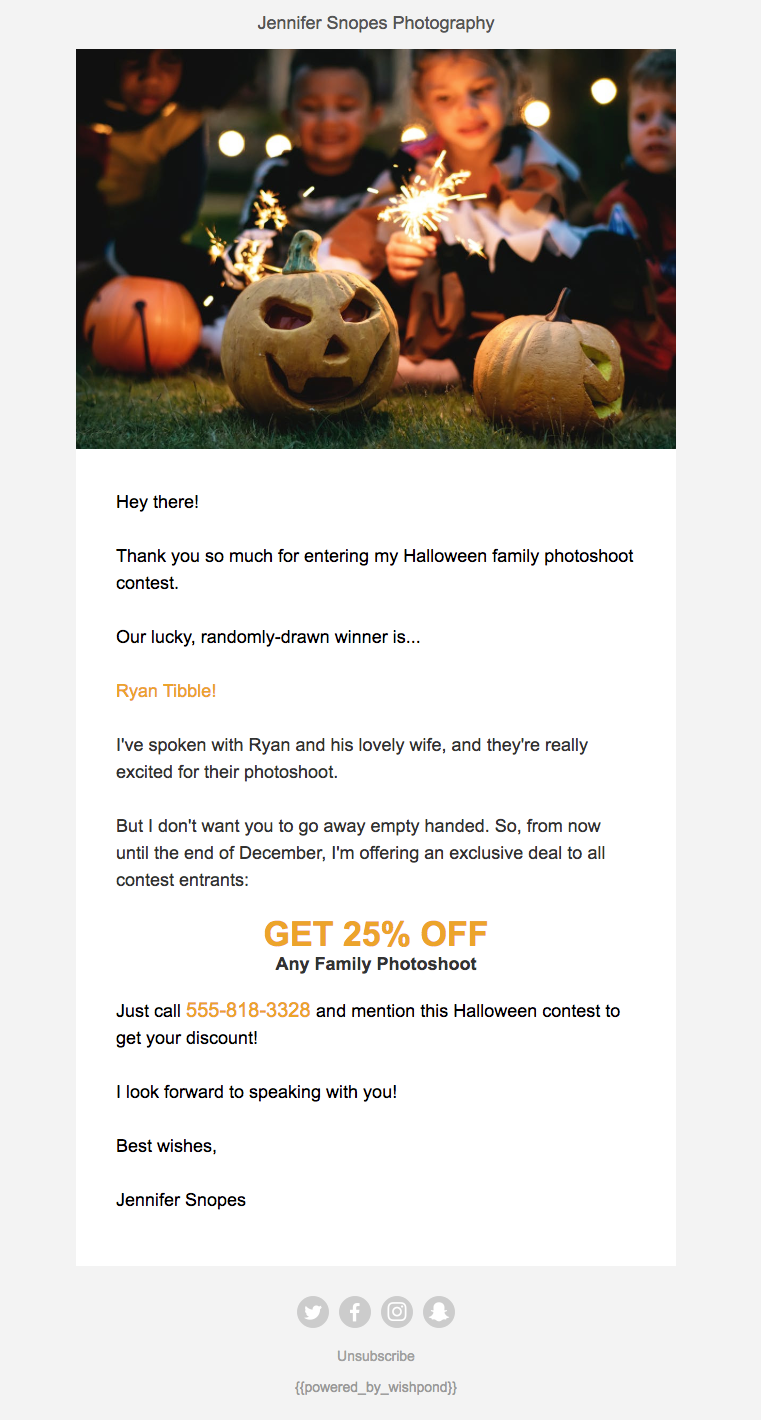
The key point in this email is the discount exclusively offered to contest entrants. Create a coupon for your ecommerce store or just ask people to call you and mention that they were part of your Halloween contest so you can set them up with a discounted plan, subscription or purchase.
Boom! You’re done.
Wrapping it up
You’ve now decided on the best prize, created your Halloween contest page, built a couple website additions to drive traffic, set up a Facebook ad campaign and written and automated a couple emails (turning entrants into customers).
Congratulations!
I hope your Halloween contest goes really well, and if you have any questions let me know!
Related Reading:
- 5 Spookily-Successful Halloween Contest Examples Critiqued
- 30 Amazing Examples of Branded Facebook Contests Done Right
- 50 Fun Contest Ideas You Can Use Today